How to create Rating content
1) Set a title for the event
In the Title section at the top of the page that opens, set a title of at most 30 characters.
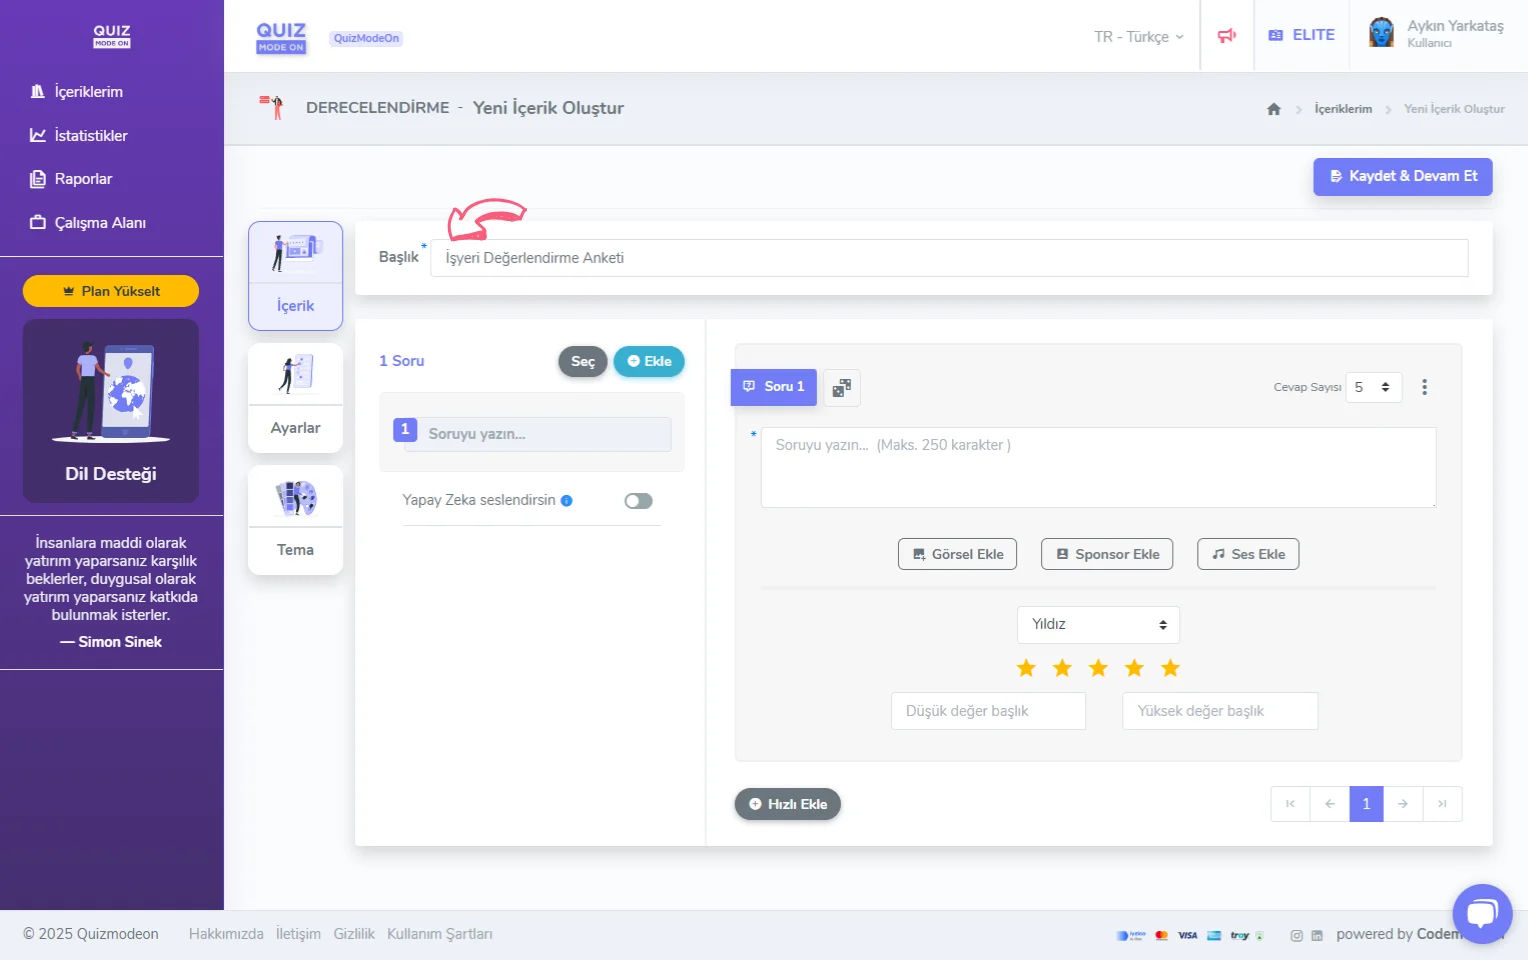
create a rating - content - title
2) Add your questions
When you use the Add button to add questions, different options appear.
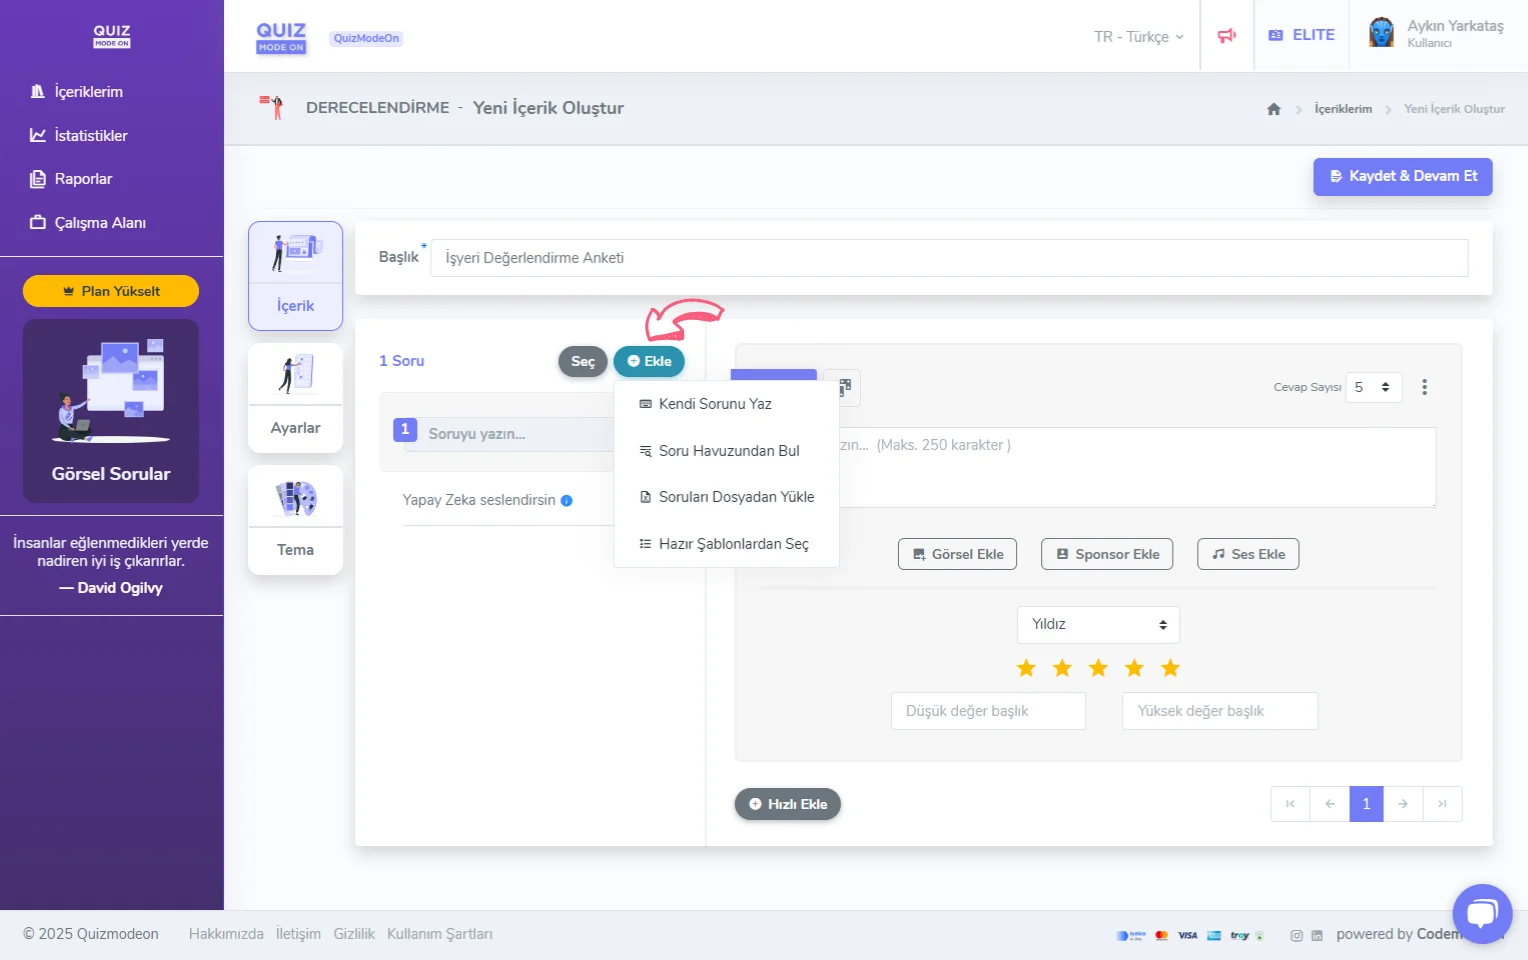
create a rating - content - adding questions
-
Write Your Own Question: A new question form opens on the page you are on so you can enter a question manually. With the Quick Add button below the question form, you can add your questions more practically and quickly.
-
Find from the Question Pool: You can add one of the questions the QuizModeOn team prepared for you, or one of the questions you wrote yourself in your earlier events.
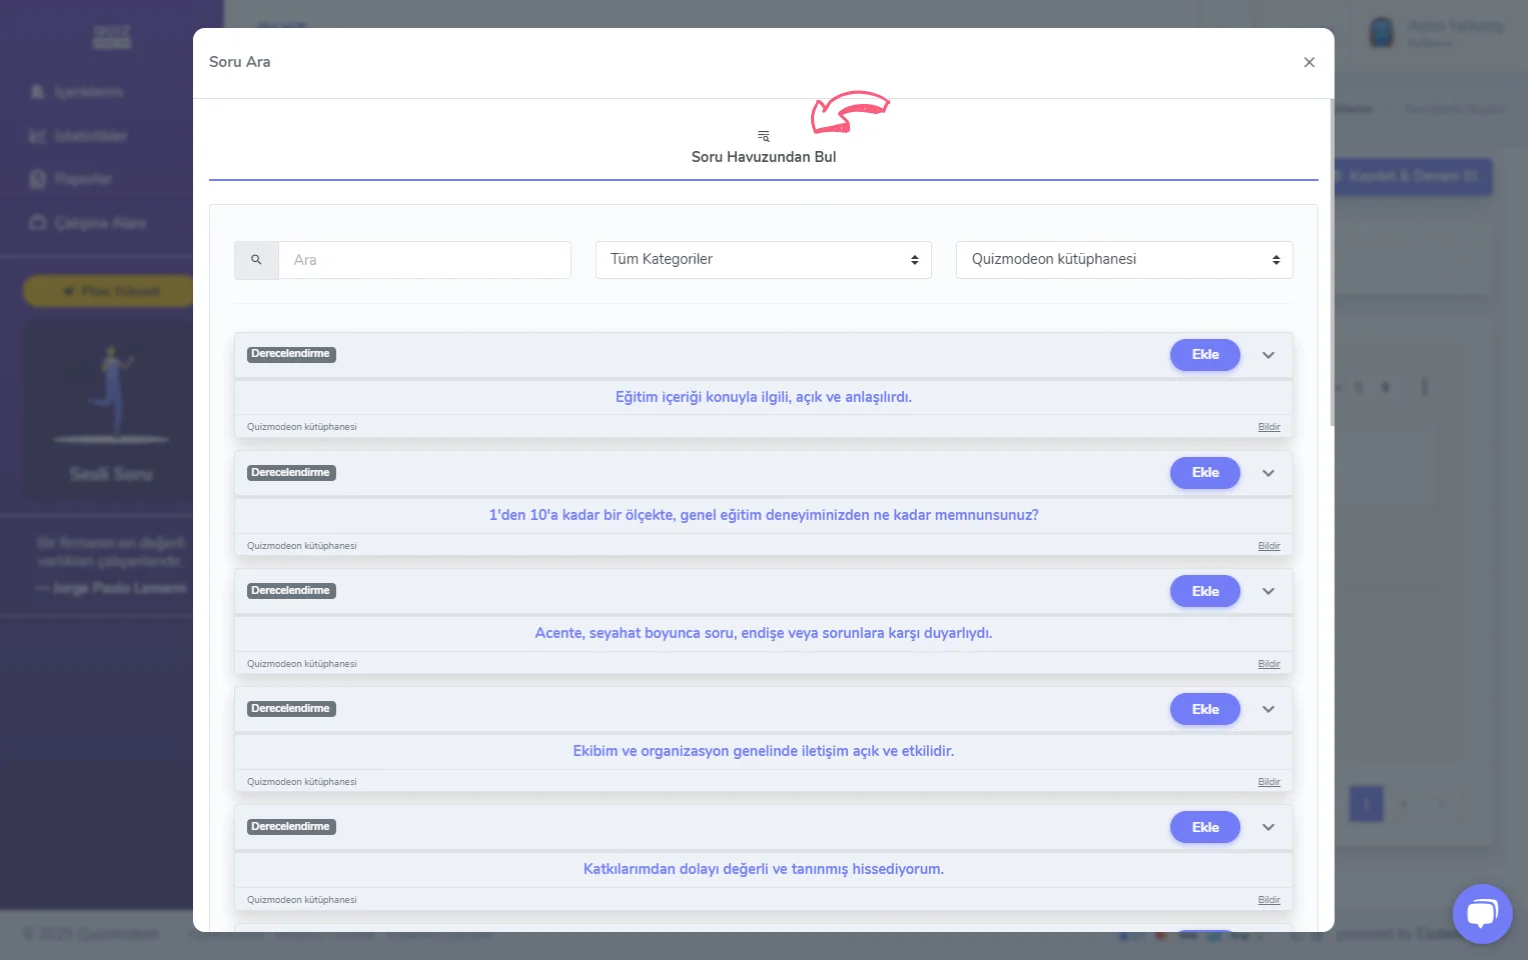
create a rating - content - adding questions - question pool
-
Upload Questions from File: You can upload questions you created yourself in Excel. We recommend downloading the Excel file with the sample content and editing it. To look at the sample Excel file, click the Download XLSX Sample link at the very bottom of the popup page that opens with the Upload Questions from File button.
-
Start from a Template: You can choose one of the question sets prepared by the QuizModeOn team according to the concept you want.
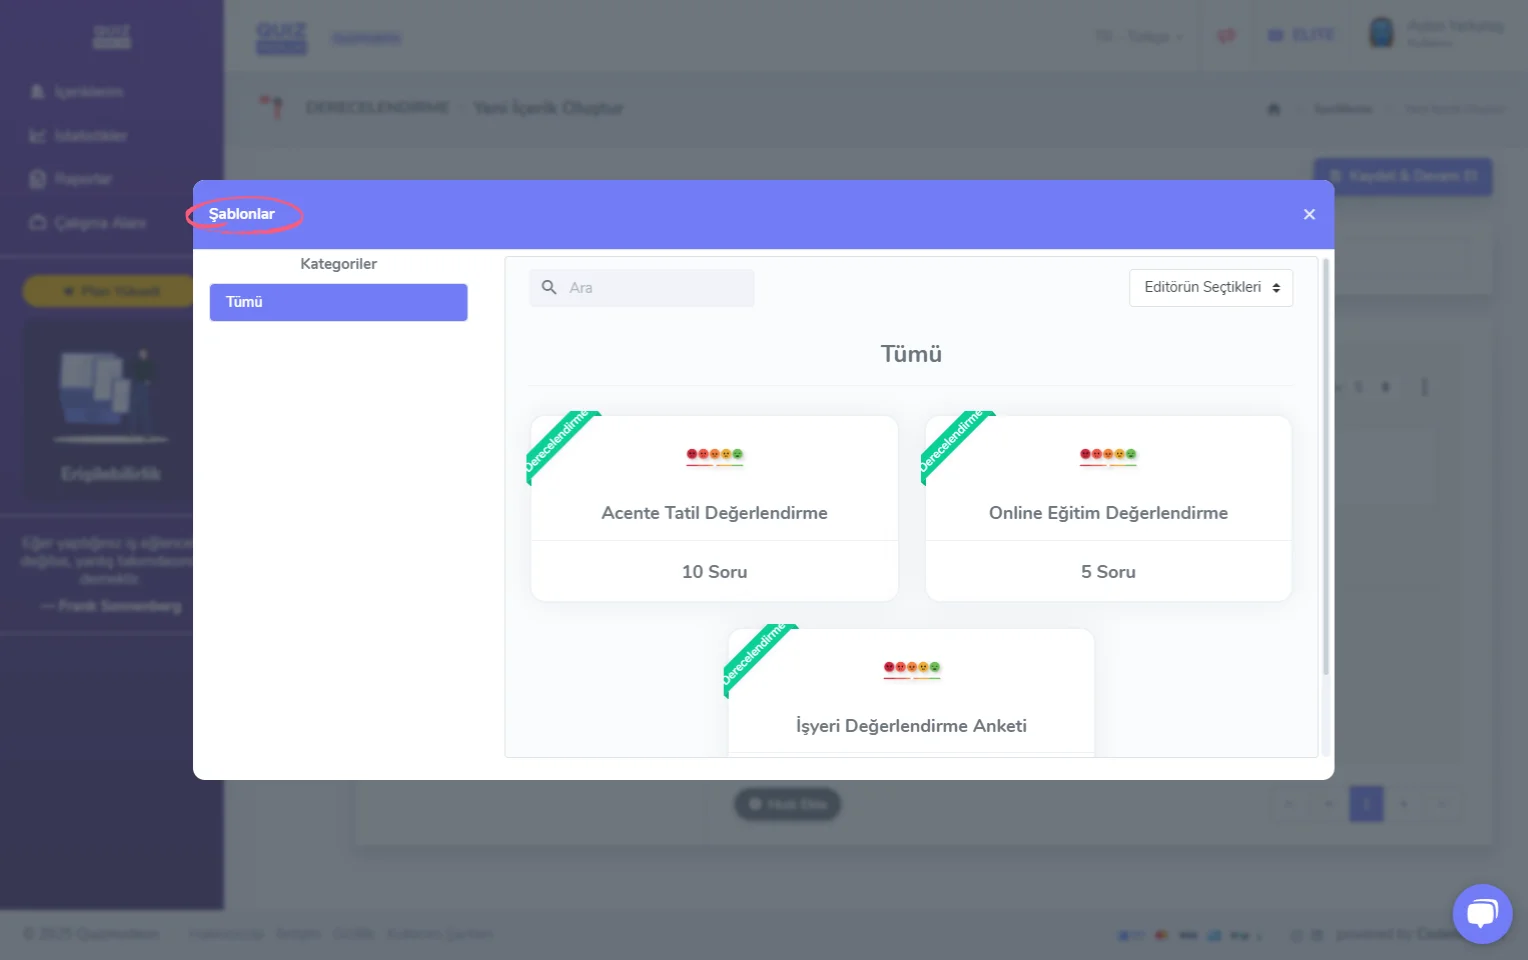
create a rating - content - adding questions - ready-made content templates
Character limit for questions
You can use a maximum of 500 characters for each question text. In the left panel that lists all the questions, you can easily change the order of the questions with drag and drop.
Question types and answers
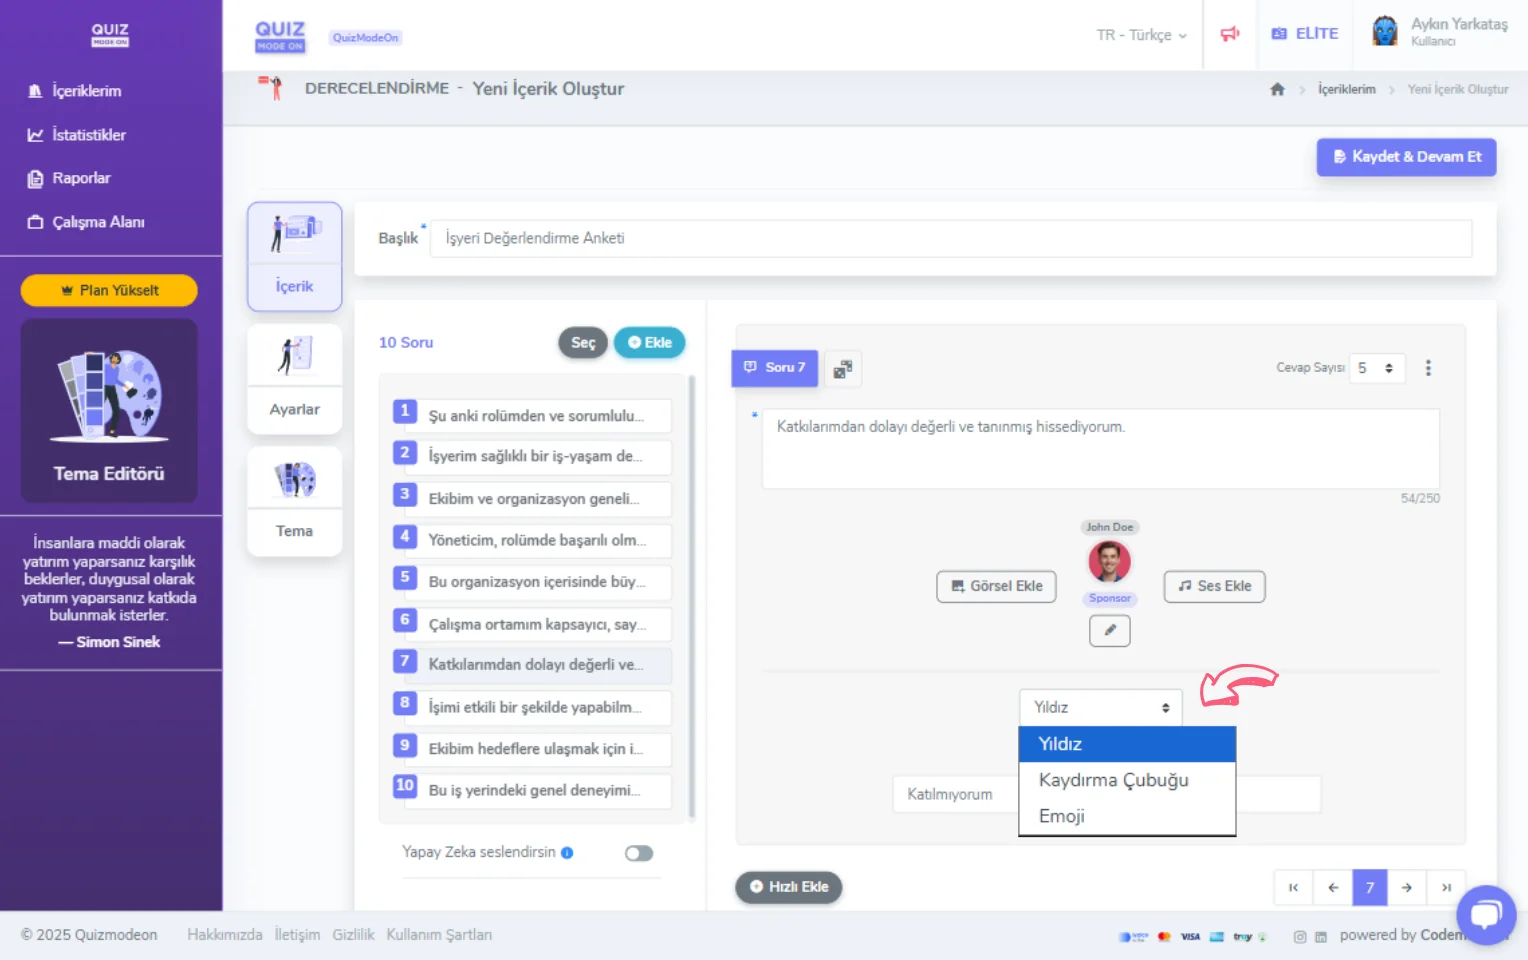
You can set up the answers by choosing one of 3 different visualization types.
- Star: By visualizing your answers with Star icons, you can set at least 2 (1-2) values and at most 10 (1-10) values.
- Slider: By visualizing your answers with a slider, you can set at least 2 (1-2) values and at most 10 (1-10) values.
- Emoji: You can visualize your answers with predefined emojis. The number of emojis is fixed at 5.
create a rating - content - adding questions - question types
For all the alternatives, you must fill in the Low Value and High Value labels below the options.
3) Delete your questions
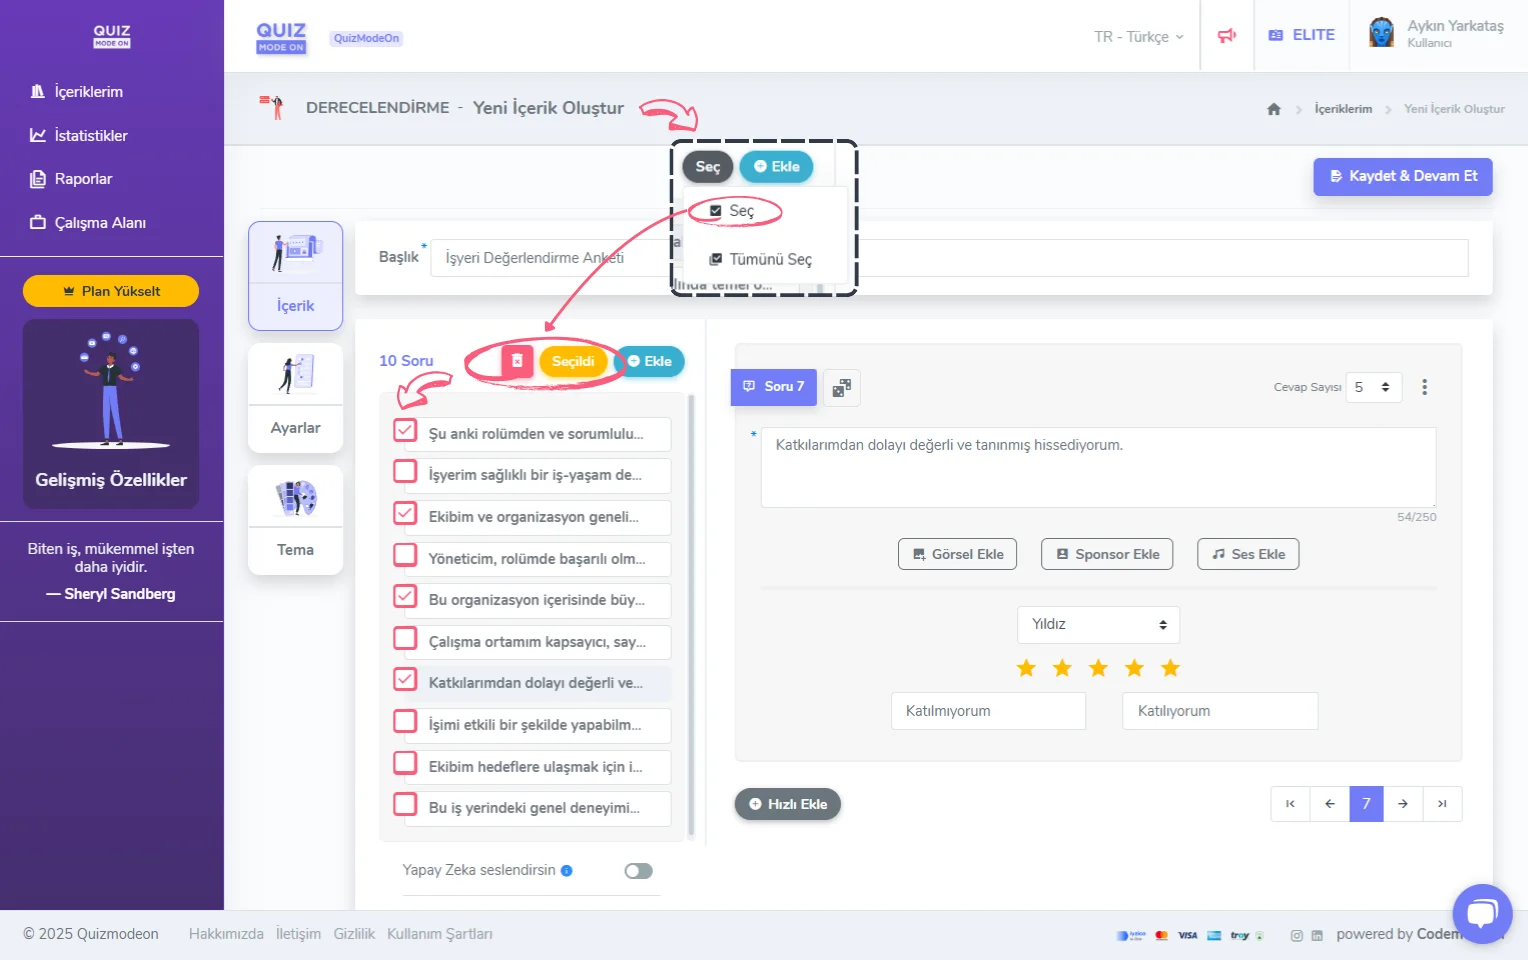
With the Select button next to the Add button, you can select the questions you want to delete and delete them in bulk.
create a rating - content - deleting questions
4) Customize your questions
You can see a preview of your questions on the right side of the section where you add them.
You can add an Image, Sponsor and Audio specific to each question.
-
If you want to use the Add Image button, you need to upload an image of 768x256 pixels. You can upload your own image, or click the Image Library button to choose one of the Pixabay images.
-
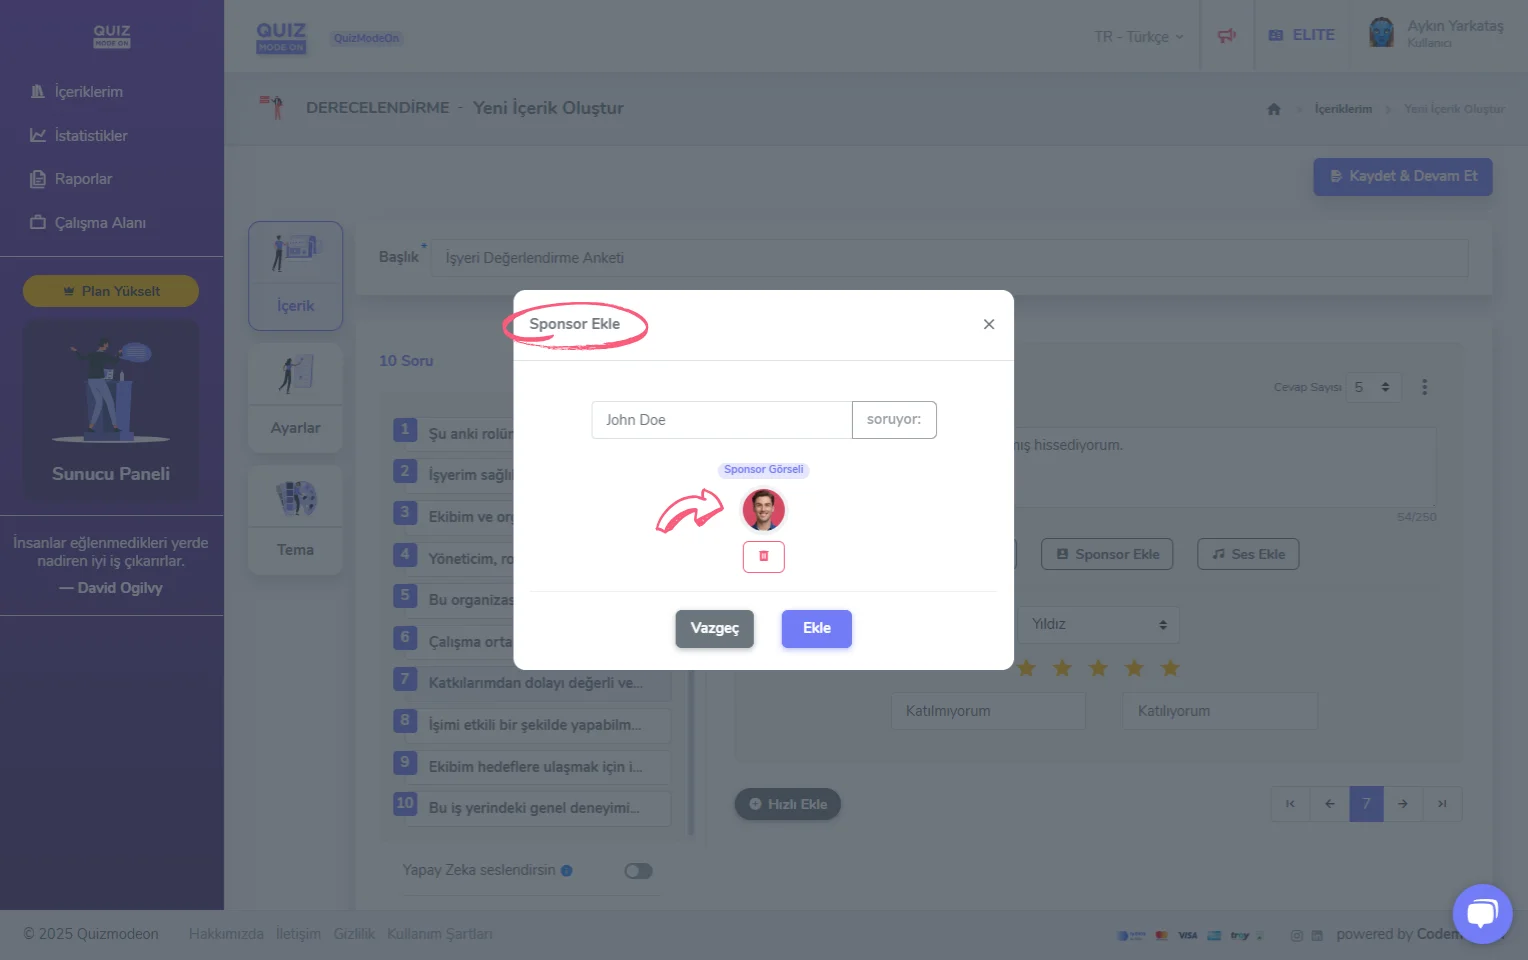
If you want to use the Add Sponsor button, you need to fill in the Sponsor Name field and upload an image of 512x512 pixels. You can upload your own image, or click the Image Library button to choose one of the Pixabay images.
create a rating - content - adding questions - sponsor question type
- If you want to use the Add Audio button, you can add any file in mp3 format.
Note: You can also prepare your Rating content to collect information similar to an NPS (net promoter score).
5) Voice your questions with AI
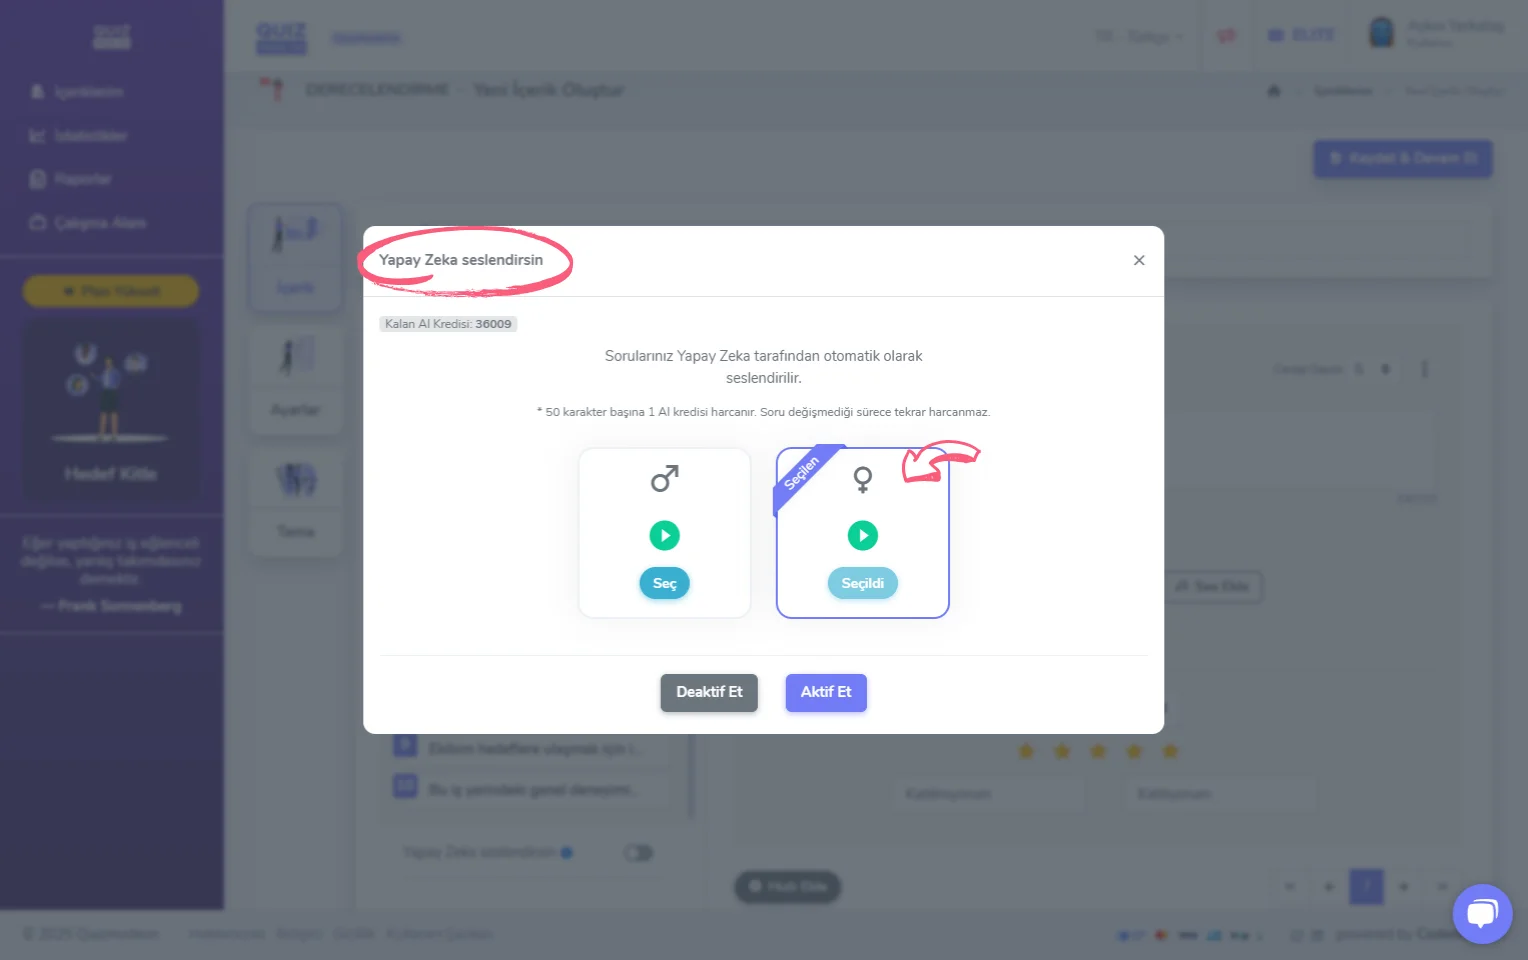
If you want the questions to be read aloud by AI, you can turn on the Read Aloud by AI button below the question list. When the button is turned on, you can choose one of the female or male voices for the voice-over.
create a rating - content - AI voice-over
Your AI credit is spent according to the number of characters in the question.
Note: While the Read Aloud by AI button is on, if the questions or answers change, AI credit is spent again. For this reason, we recommend turning on the Read Aloud by AI button after you finalize your content.