Explore the event management page
How are live events managed in 5 steps?
- The event preparations are completed and you open the management page.
- You click the event Start Link to go to the presenter page.
- You wait for participants to log in to the event.
- The presenter starts the event.
- The event ends automatically or is ended by the presenter.
Open the event management page in the portal
You can reach the event management page in 2 different ways.
1- After you create your event, select the Start and Manage button in the popup screen that appears to go to the event management page.
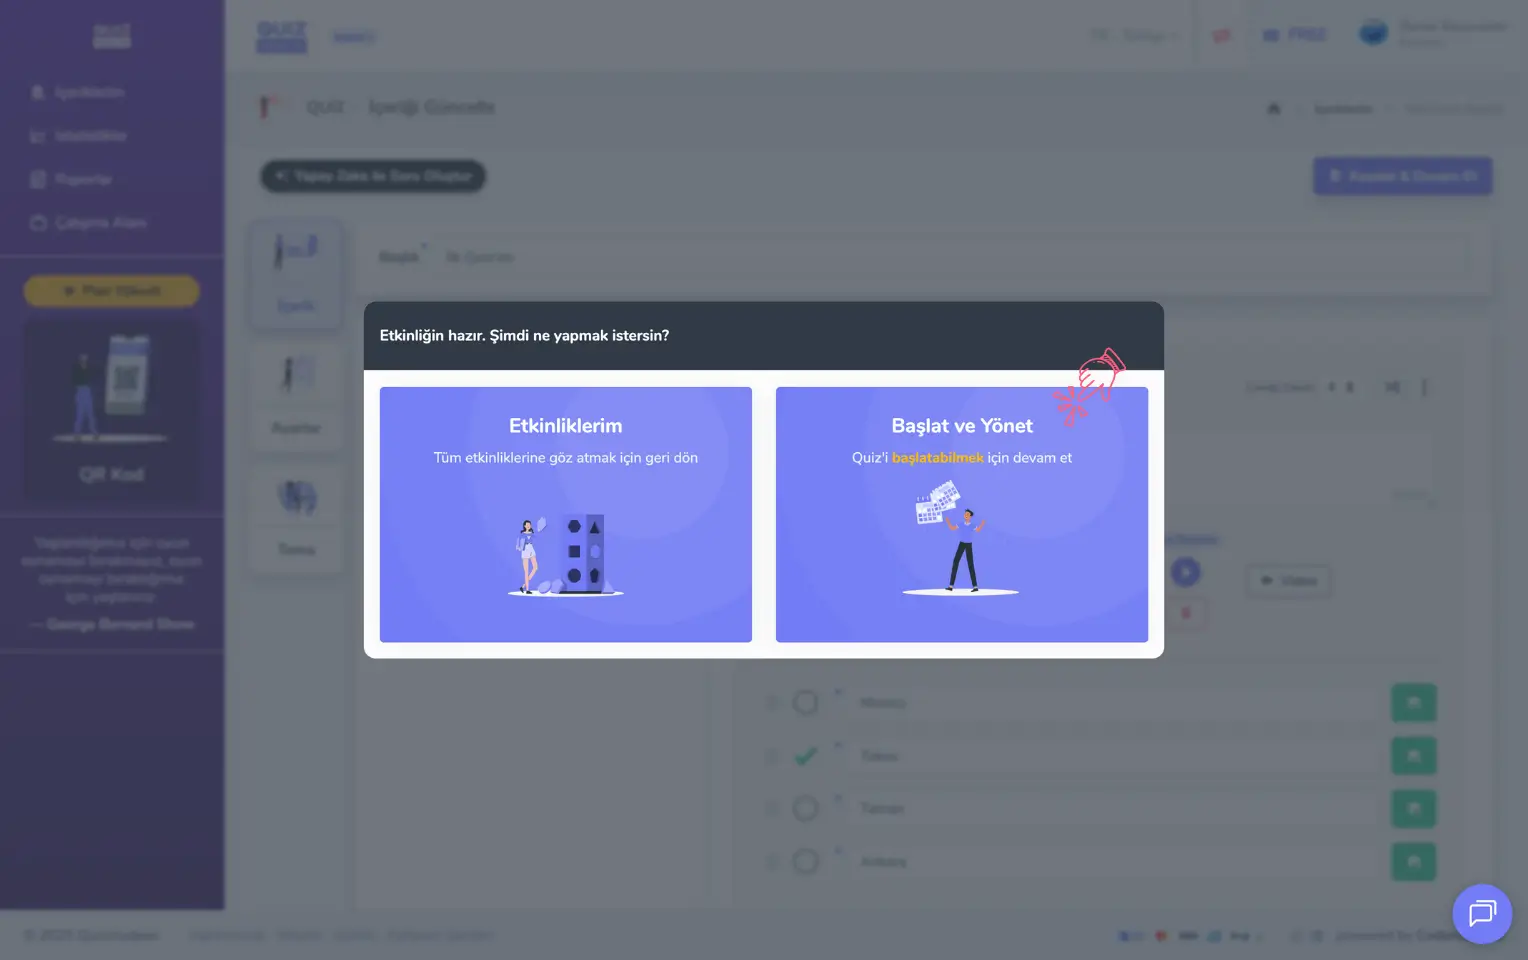
admin member - my events - creating a new event - managing the event
Note: If you go to the event management page right after creating your event, you see the current status of the event as Waiting, because the event has not started yet.
2- On the My Events home page you see a list of all the events you have created so far. Find the event you want there and press the Manage button to go to the event management page.
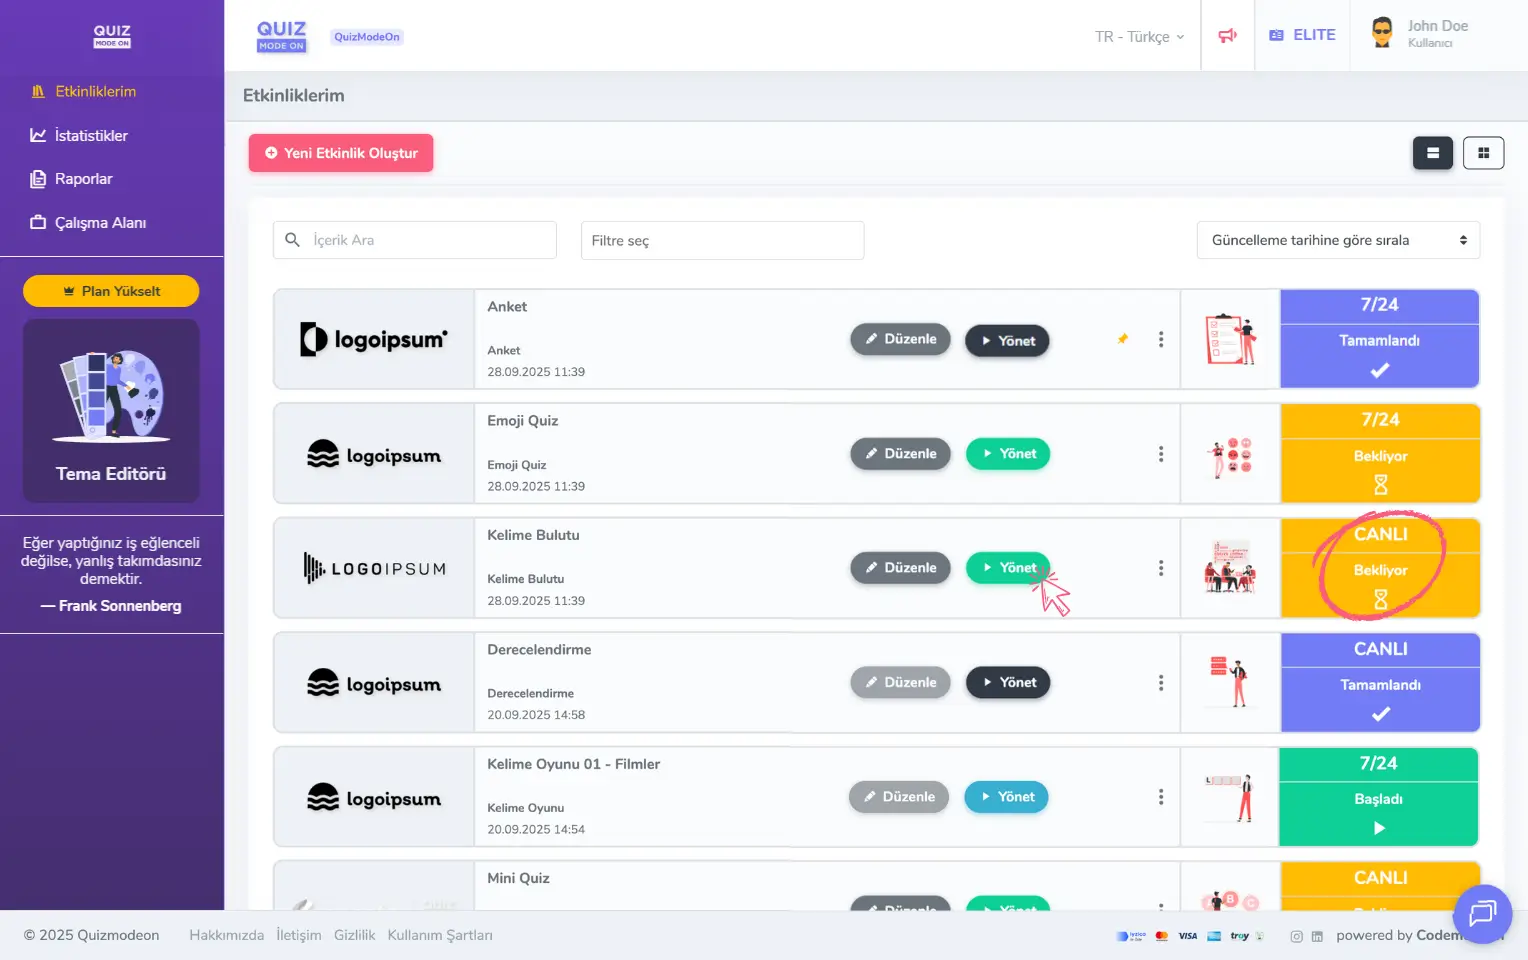
admin member - home page - my events - live event - managing the event
Check the current status of the event
Live events can be in 3 different statuses.
- Waiting: The event has not started yet.
- Started: The event has started and is in progress.
- Finished: The event has ended.
Note #1: The current status of the event is shown at the far right of every event on the home page, and it is also shown clearly on the event management page.
Note #2: Each event status is shown in a different color. Waiting is yellow, Started is green and Finished is blue/purple.
Note #3: In live events, participants can log in while the event is in the Waiting status. In asynchronous (24/7) events, however, participants cannot log in while the event is in the Waiting status.
Waiting events
An event moves to the Waiting status right after it is created. This status represents the state before the event starts.
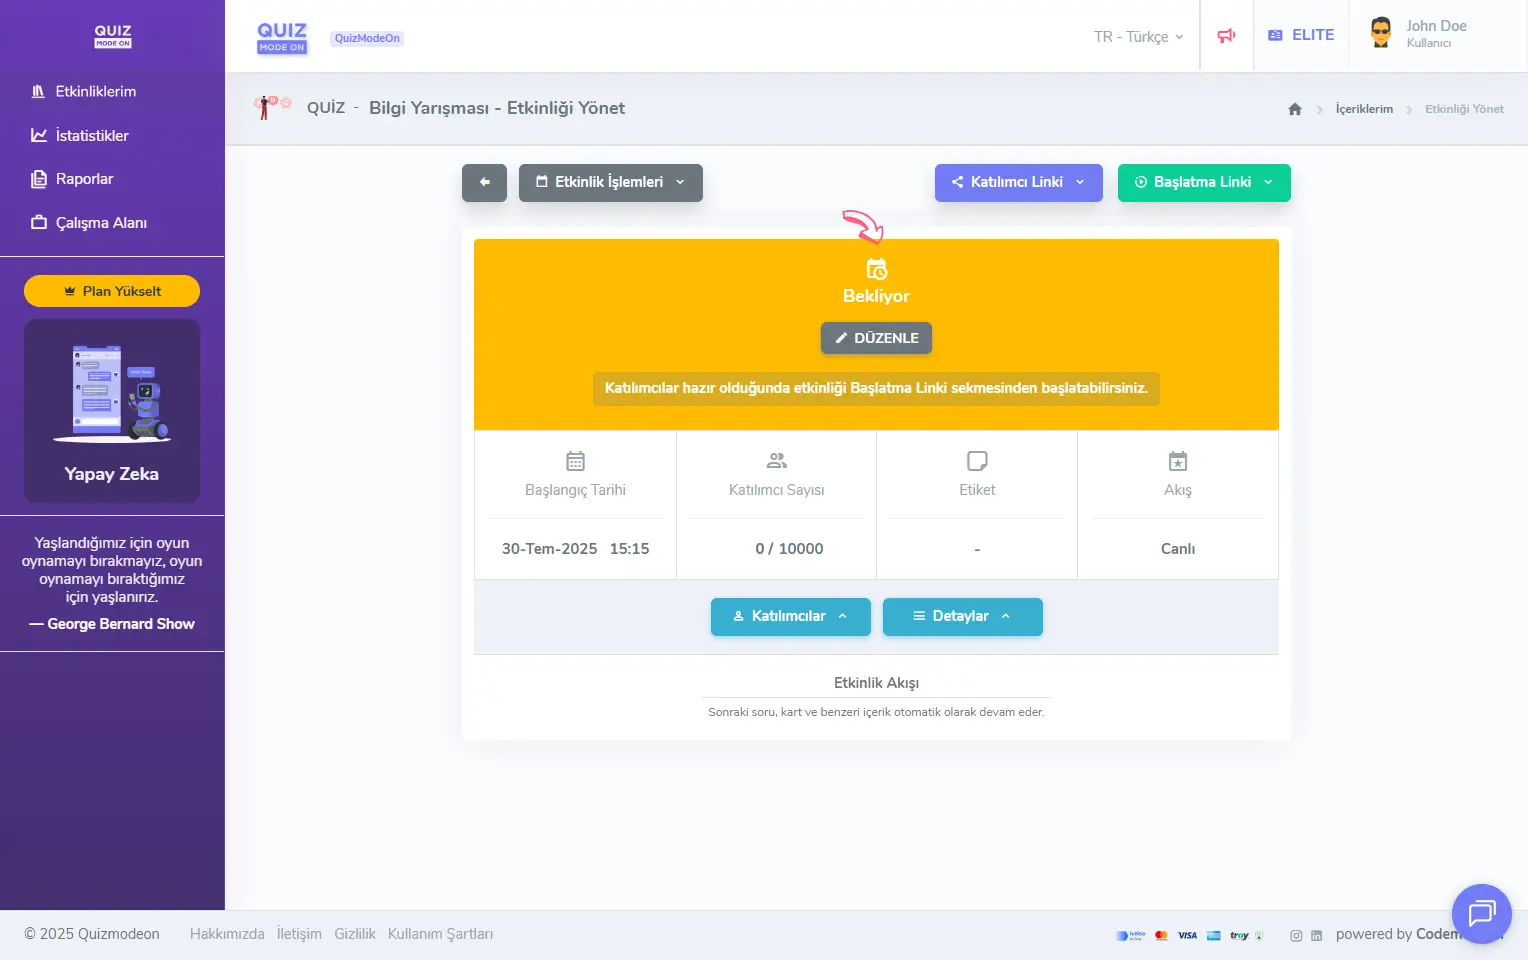
admin member - events - event management - live event - waiting event
Participant link
If you want to share login details with participants easily before a live event, click the Participant Link button and pick one of 3 options.
Share public link with participants: The login link shared here does not ask participants for a PIN code and takes them straight to the registration form, so they can log in easily.
Show public link QR code: The QR code shared here does not ask participants for a PIN code and takes them straight to the registration form, so they can log in easily.
Share private access link: The login link shared here first asks participants for a PIN code and then takes them to the registration form to log in.
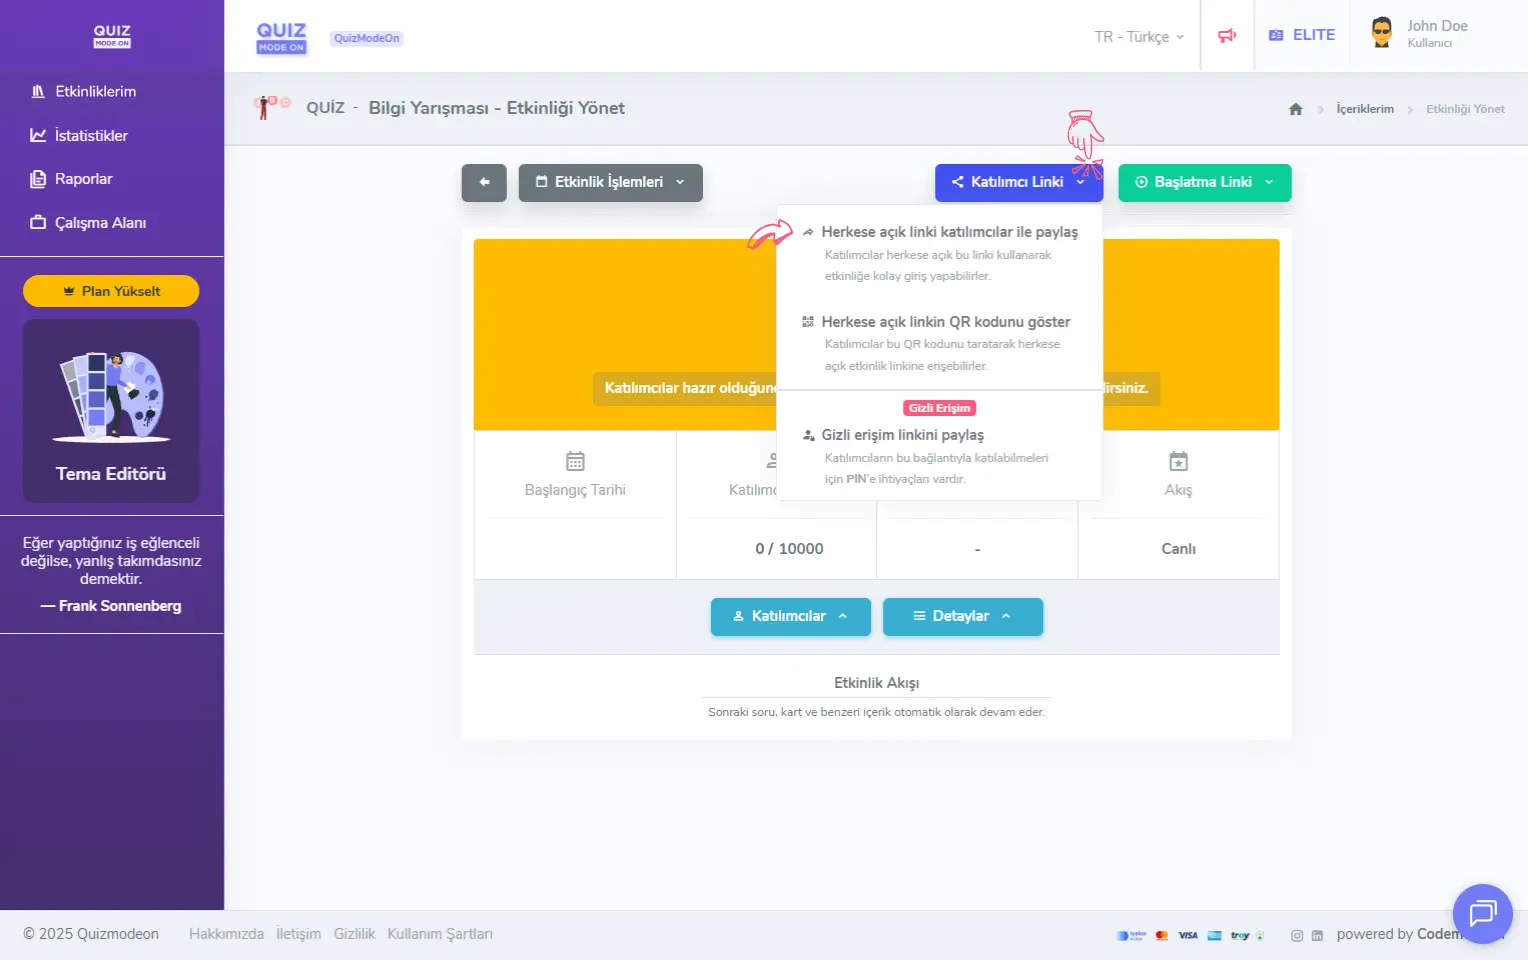
admin member - events - event management - live event - participant link
When you click Share public link with participants, you can share the login details for participants as a link or a QR code.
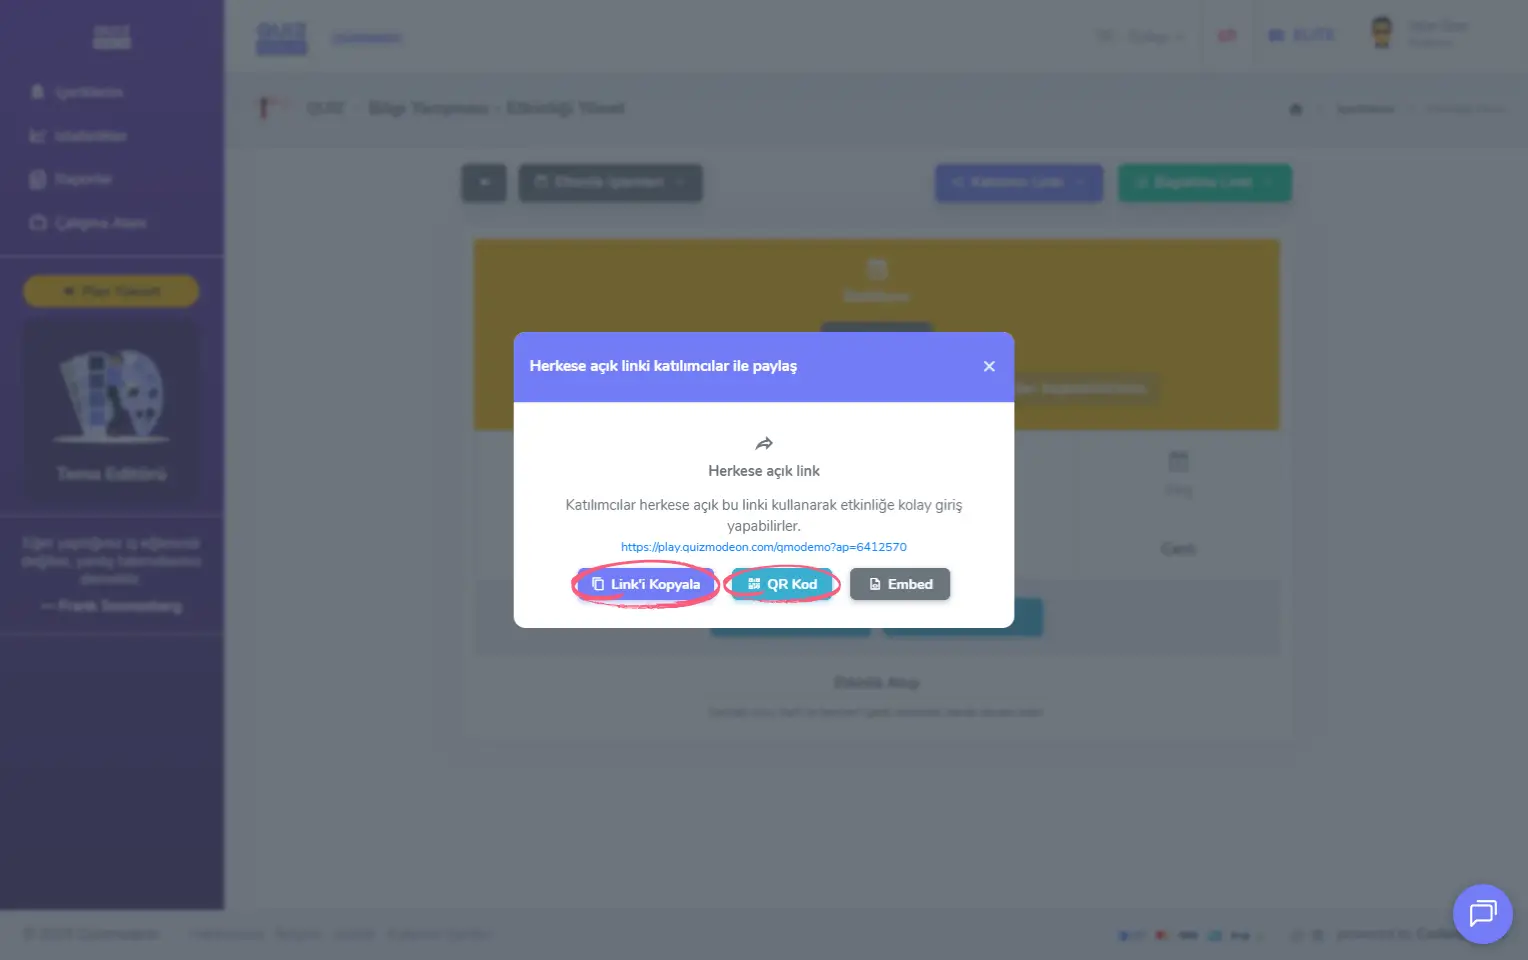
admin member - events - event management - live event - participant link - copying the link and sharing the QR code
When you click Share private access link, you can share the login details for participants as a link or a QR code. You also need to share the PIN code separately so they can log in.
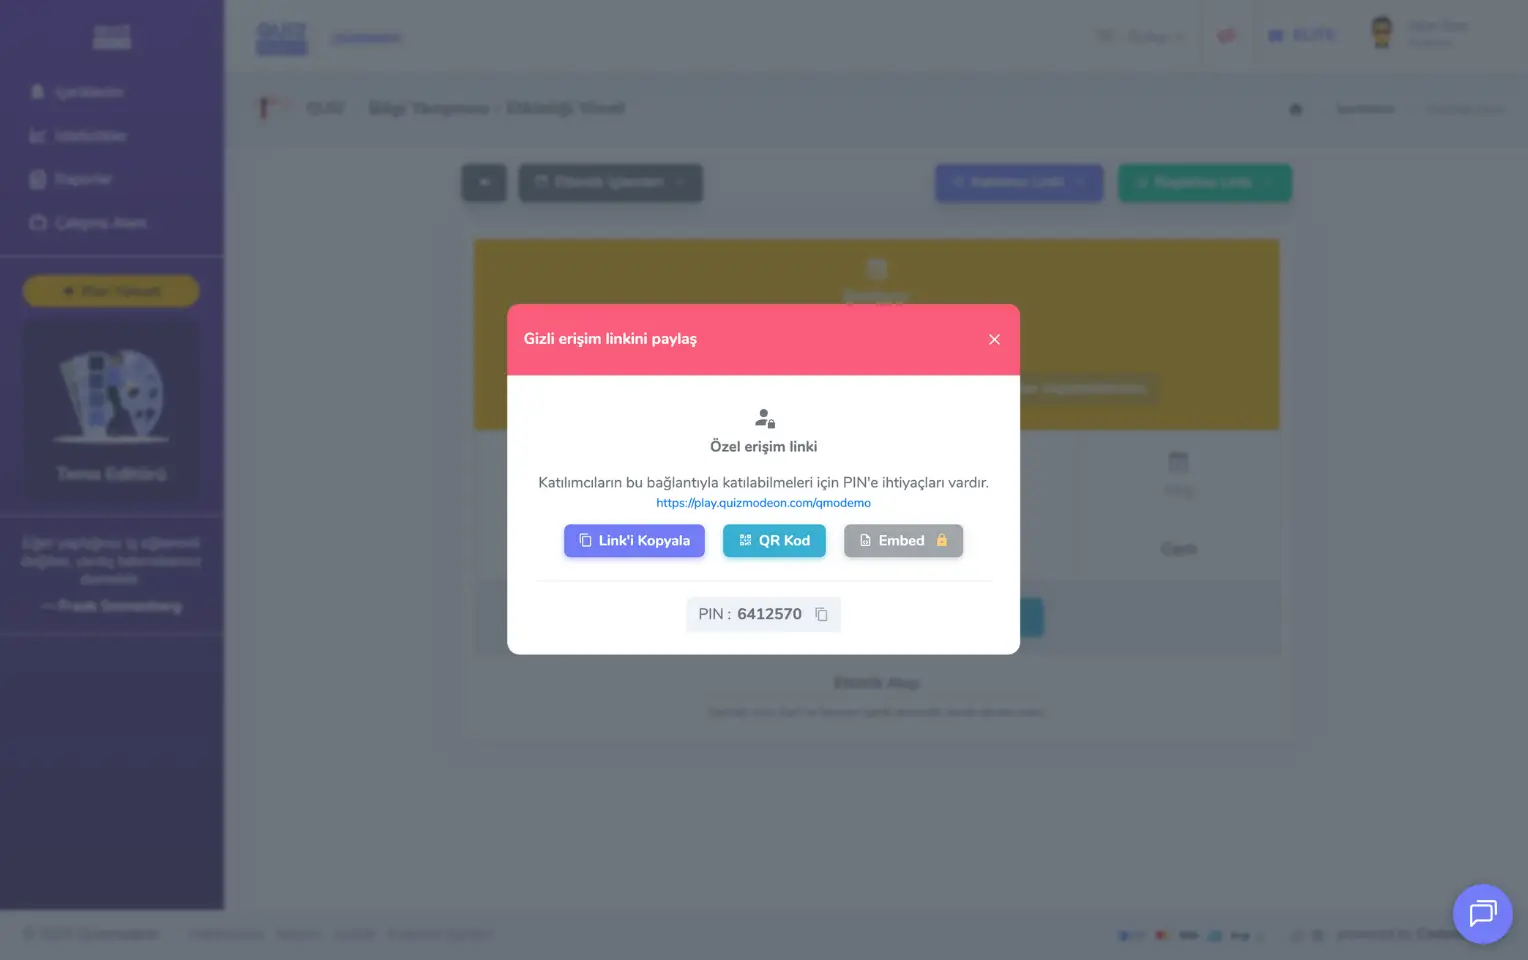
admin member - events - event management - live event - private participant link - pin, link and qr code
Note #1: If you want to offer participants a more user-friendly experience, use Share public link with participants, the most preferred method.
Note #2: If you will follow the flow together with participants during the event and want them to join shortly before it starts, you do not have to share the link beforehand. You can have them log in with the QR code on the presenter/moderator page that you open from the Start Link, and then start the event.
Note #3: In live events, participants register after opening the link and wait on the Lobby screen. They wait for the presenter (moderator) to start the event.
Start Link
To start a live event, click the Start Link button and select Open presenter page and start.
If you want someone else to manage the event flow for you, select Copy presenter page link and share the link with the person who will take the moderator role.
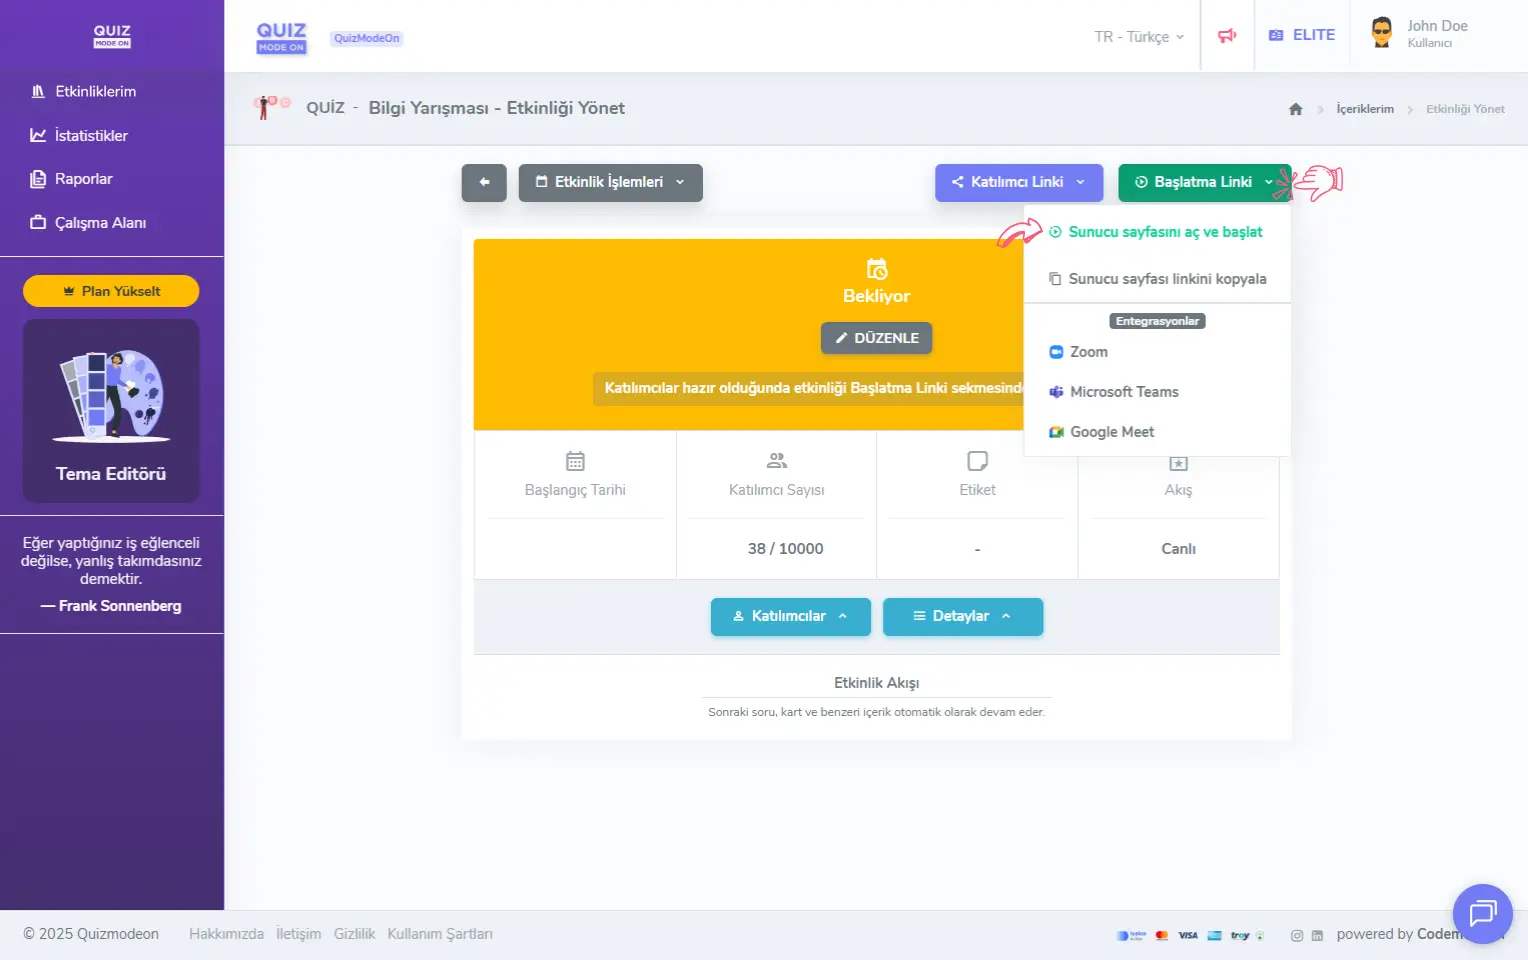
admin member - events - event management - live event - start link
In live events, the event flow starts after the presenter (moderator) presses the Start the Event button.
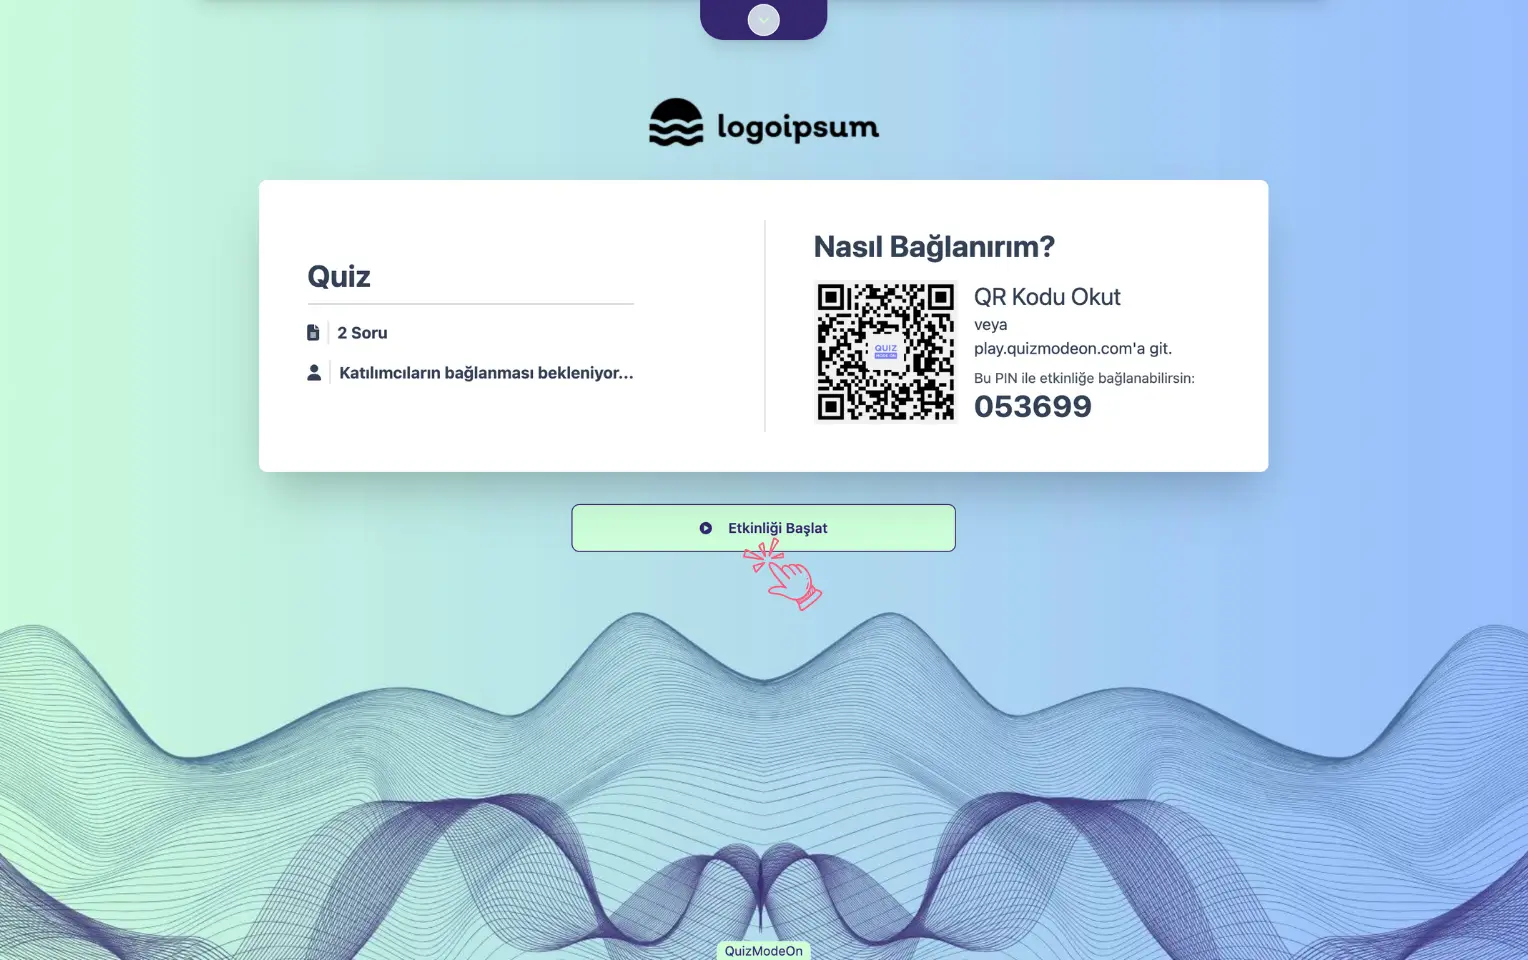
moderator - presenter page - starting the event
Started events
An event moves to the Started status right after it starts. This status means the event flow has begun. You can also follow the current state of the flow from the progress bar at the bottom of the management page.
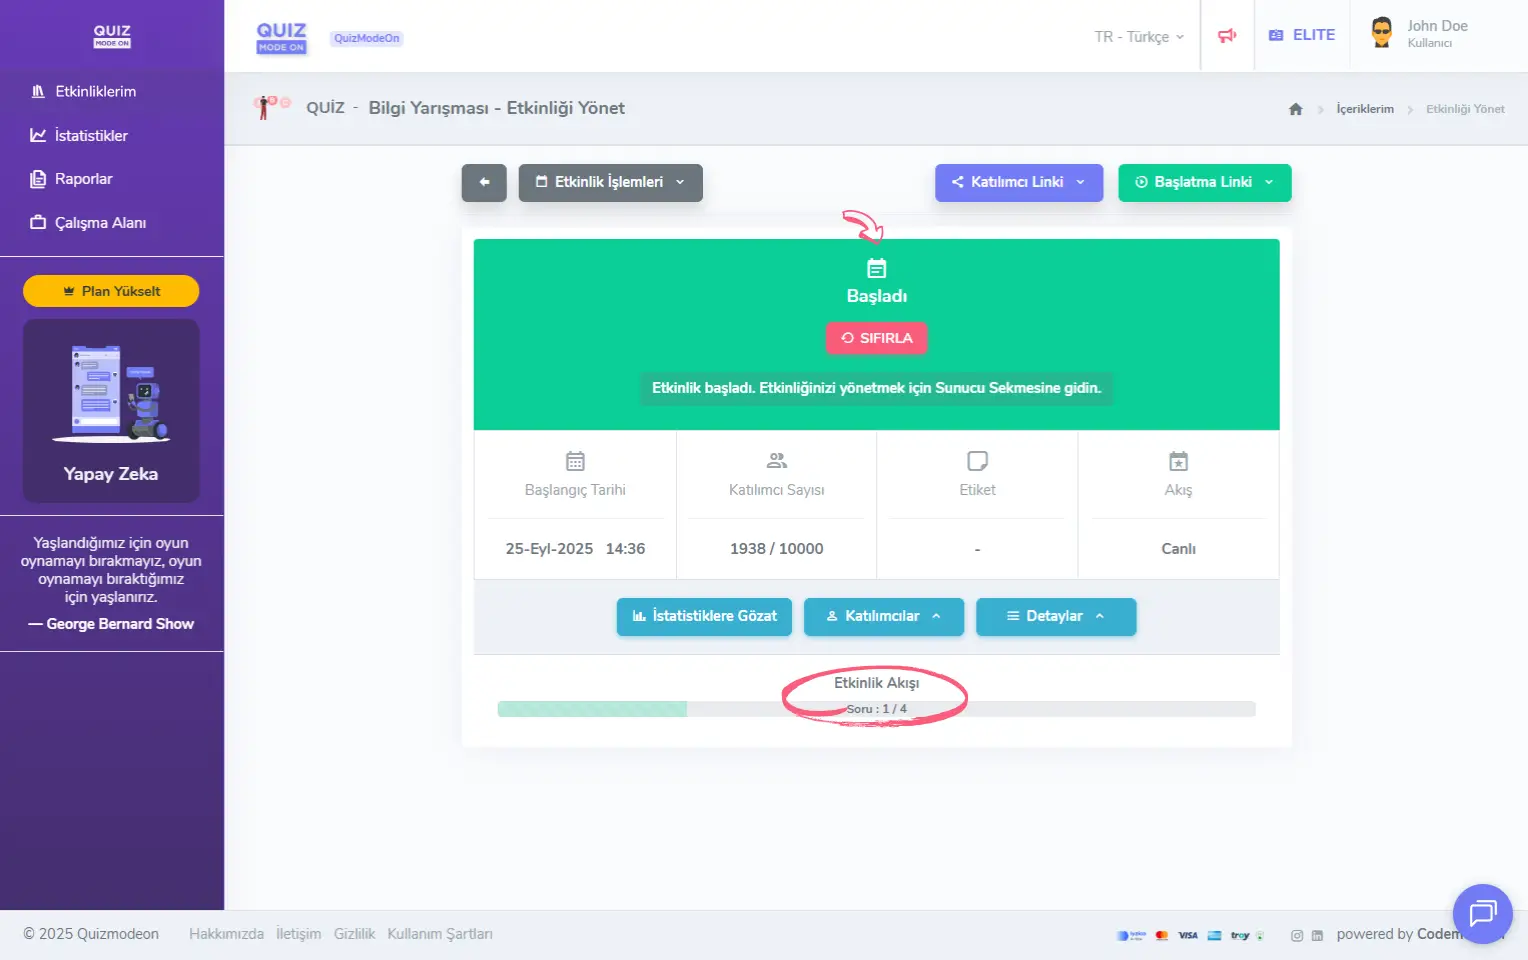
admin member - events - event management - live event - started event
Note: Since the whole event flow is managed on the presenter (moderator) page, details such as the current question and the current standings are shown on its screen.
Finished events
An event moves to the Finished status right after it ends. This status means the event flow has ended.
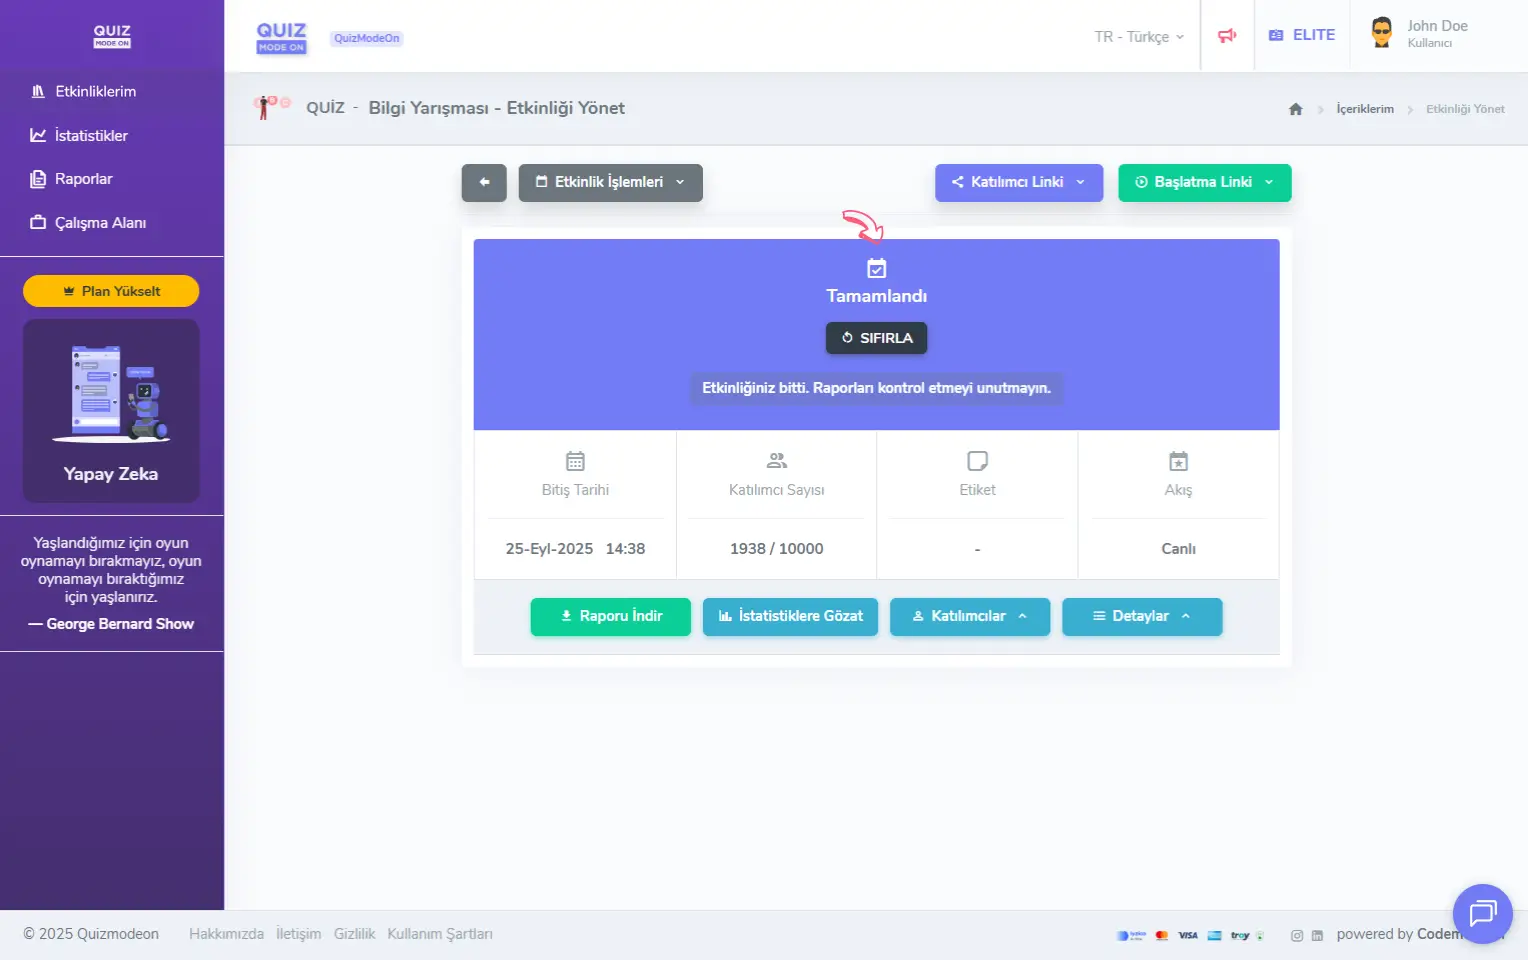
admin member - events - event management - live event - finished event
View reports and statistics
After the event is finished, you can open the event reports, charts and all participant data here.
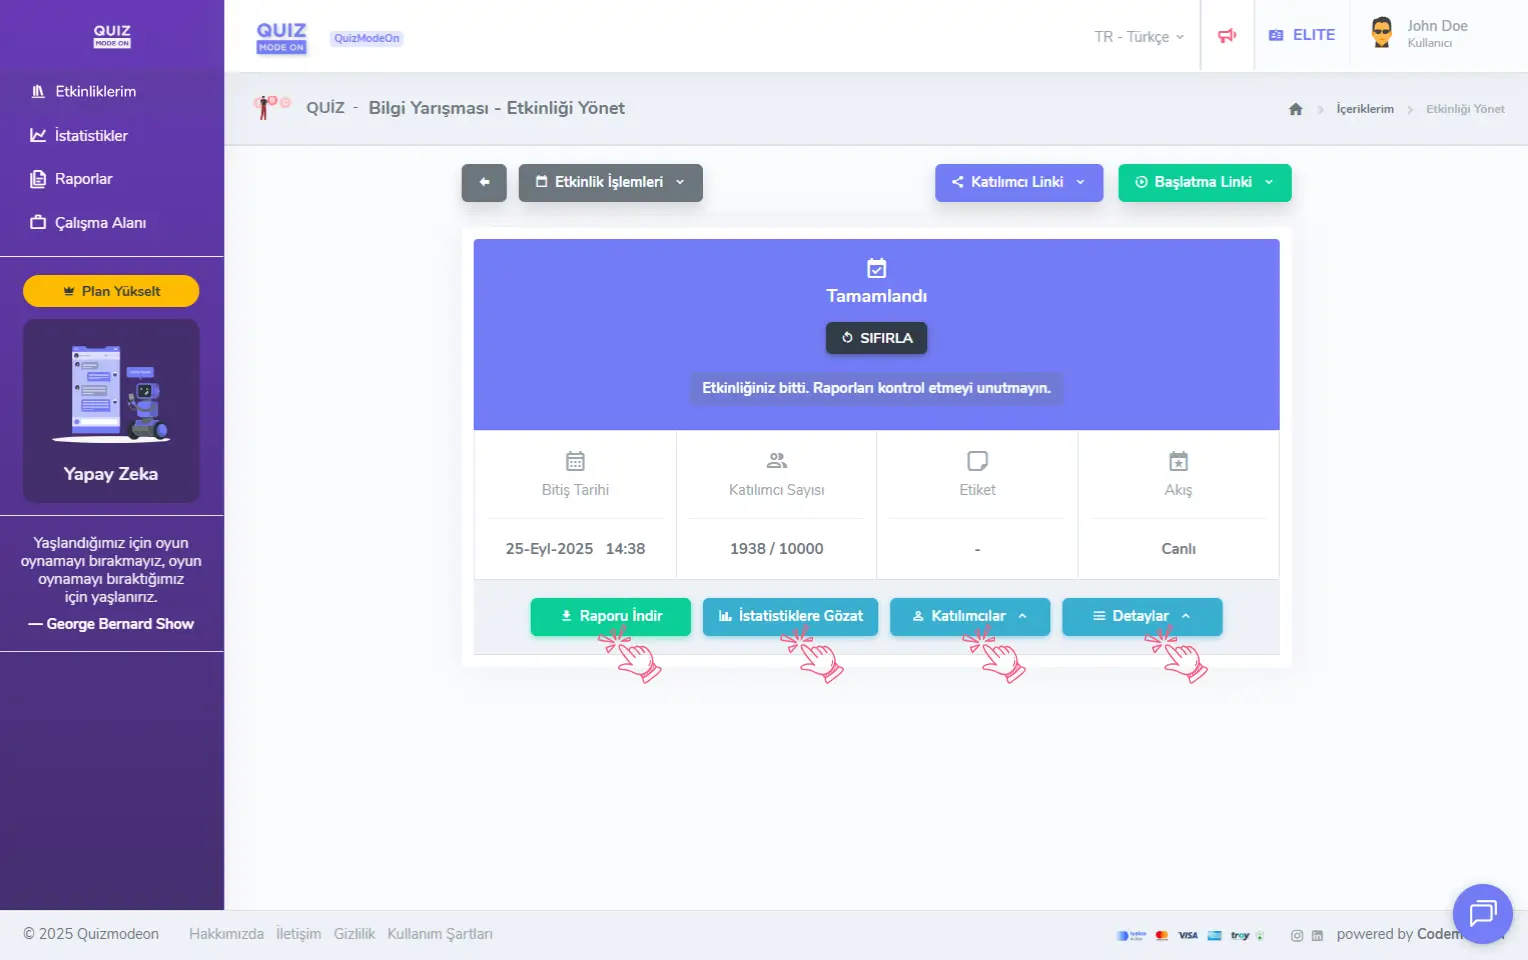
admin member - events - event management - live event - reports and statistics
Event Report: After each event, a comprehensive report with all the participants’ data for the event is created. Click the Download Report button to download the event report in Excel format. The report contains general information (login time, avatar choice, etc.), participant information (name, surname, ID, email, etc.) and data specific to the event format (for a quiz, for example, the number of correct answers, joker usage, score and ranking).
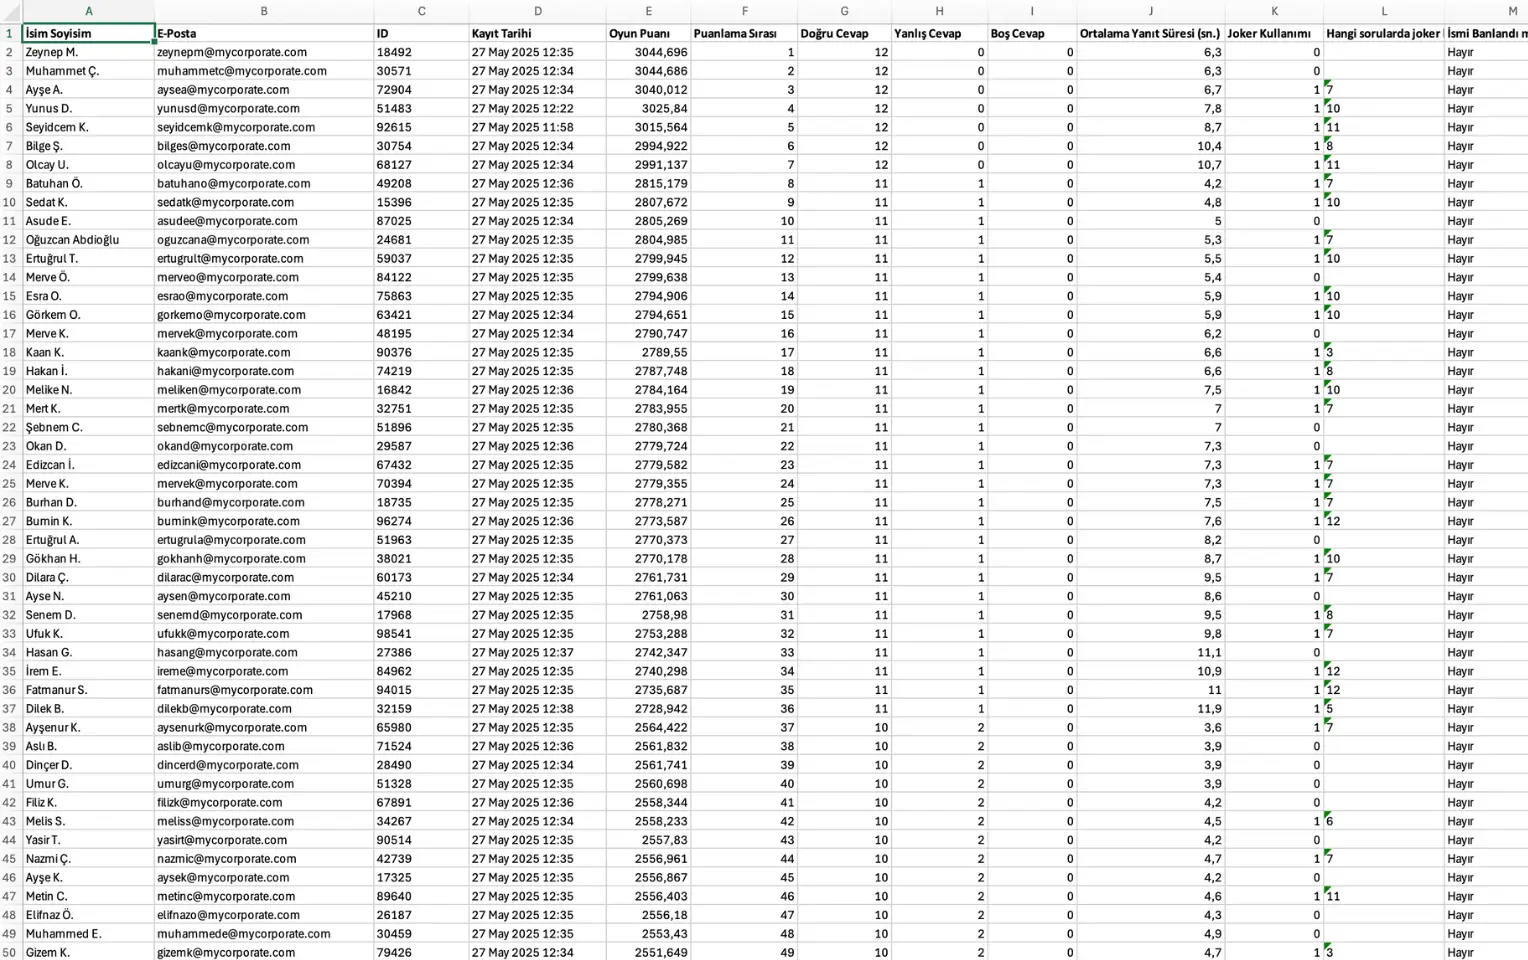
admin member - events - event management - reports - excel output
Charts: If you want a quick preview of the results after each event, click the View Statistics button to look at the charts.
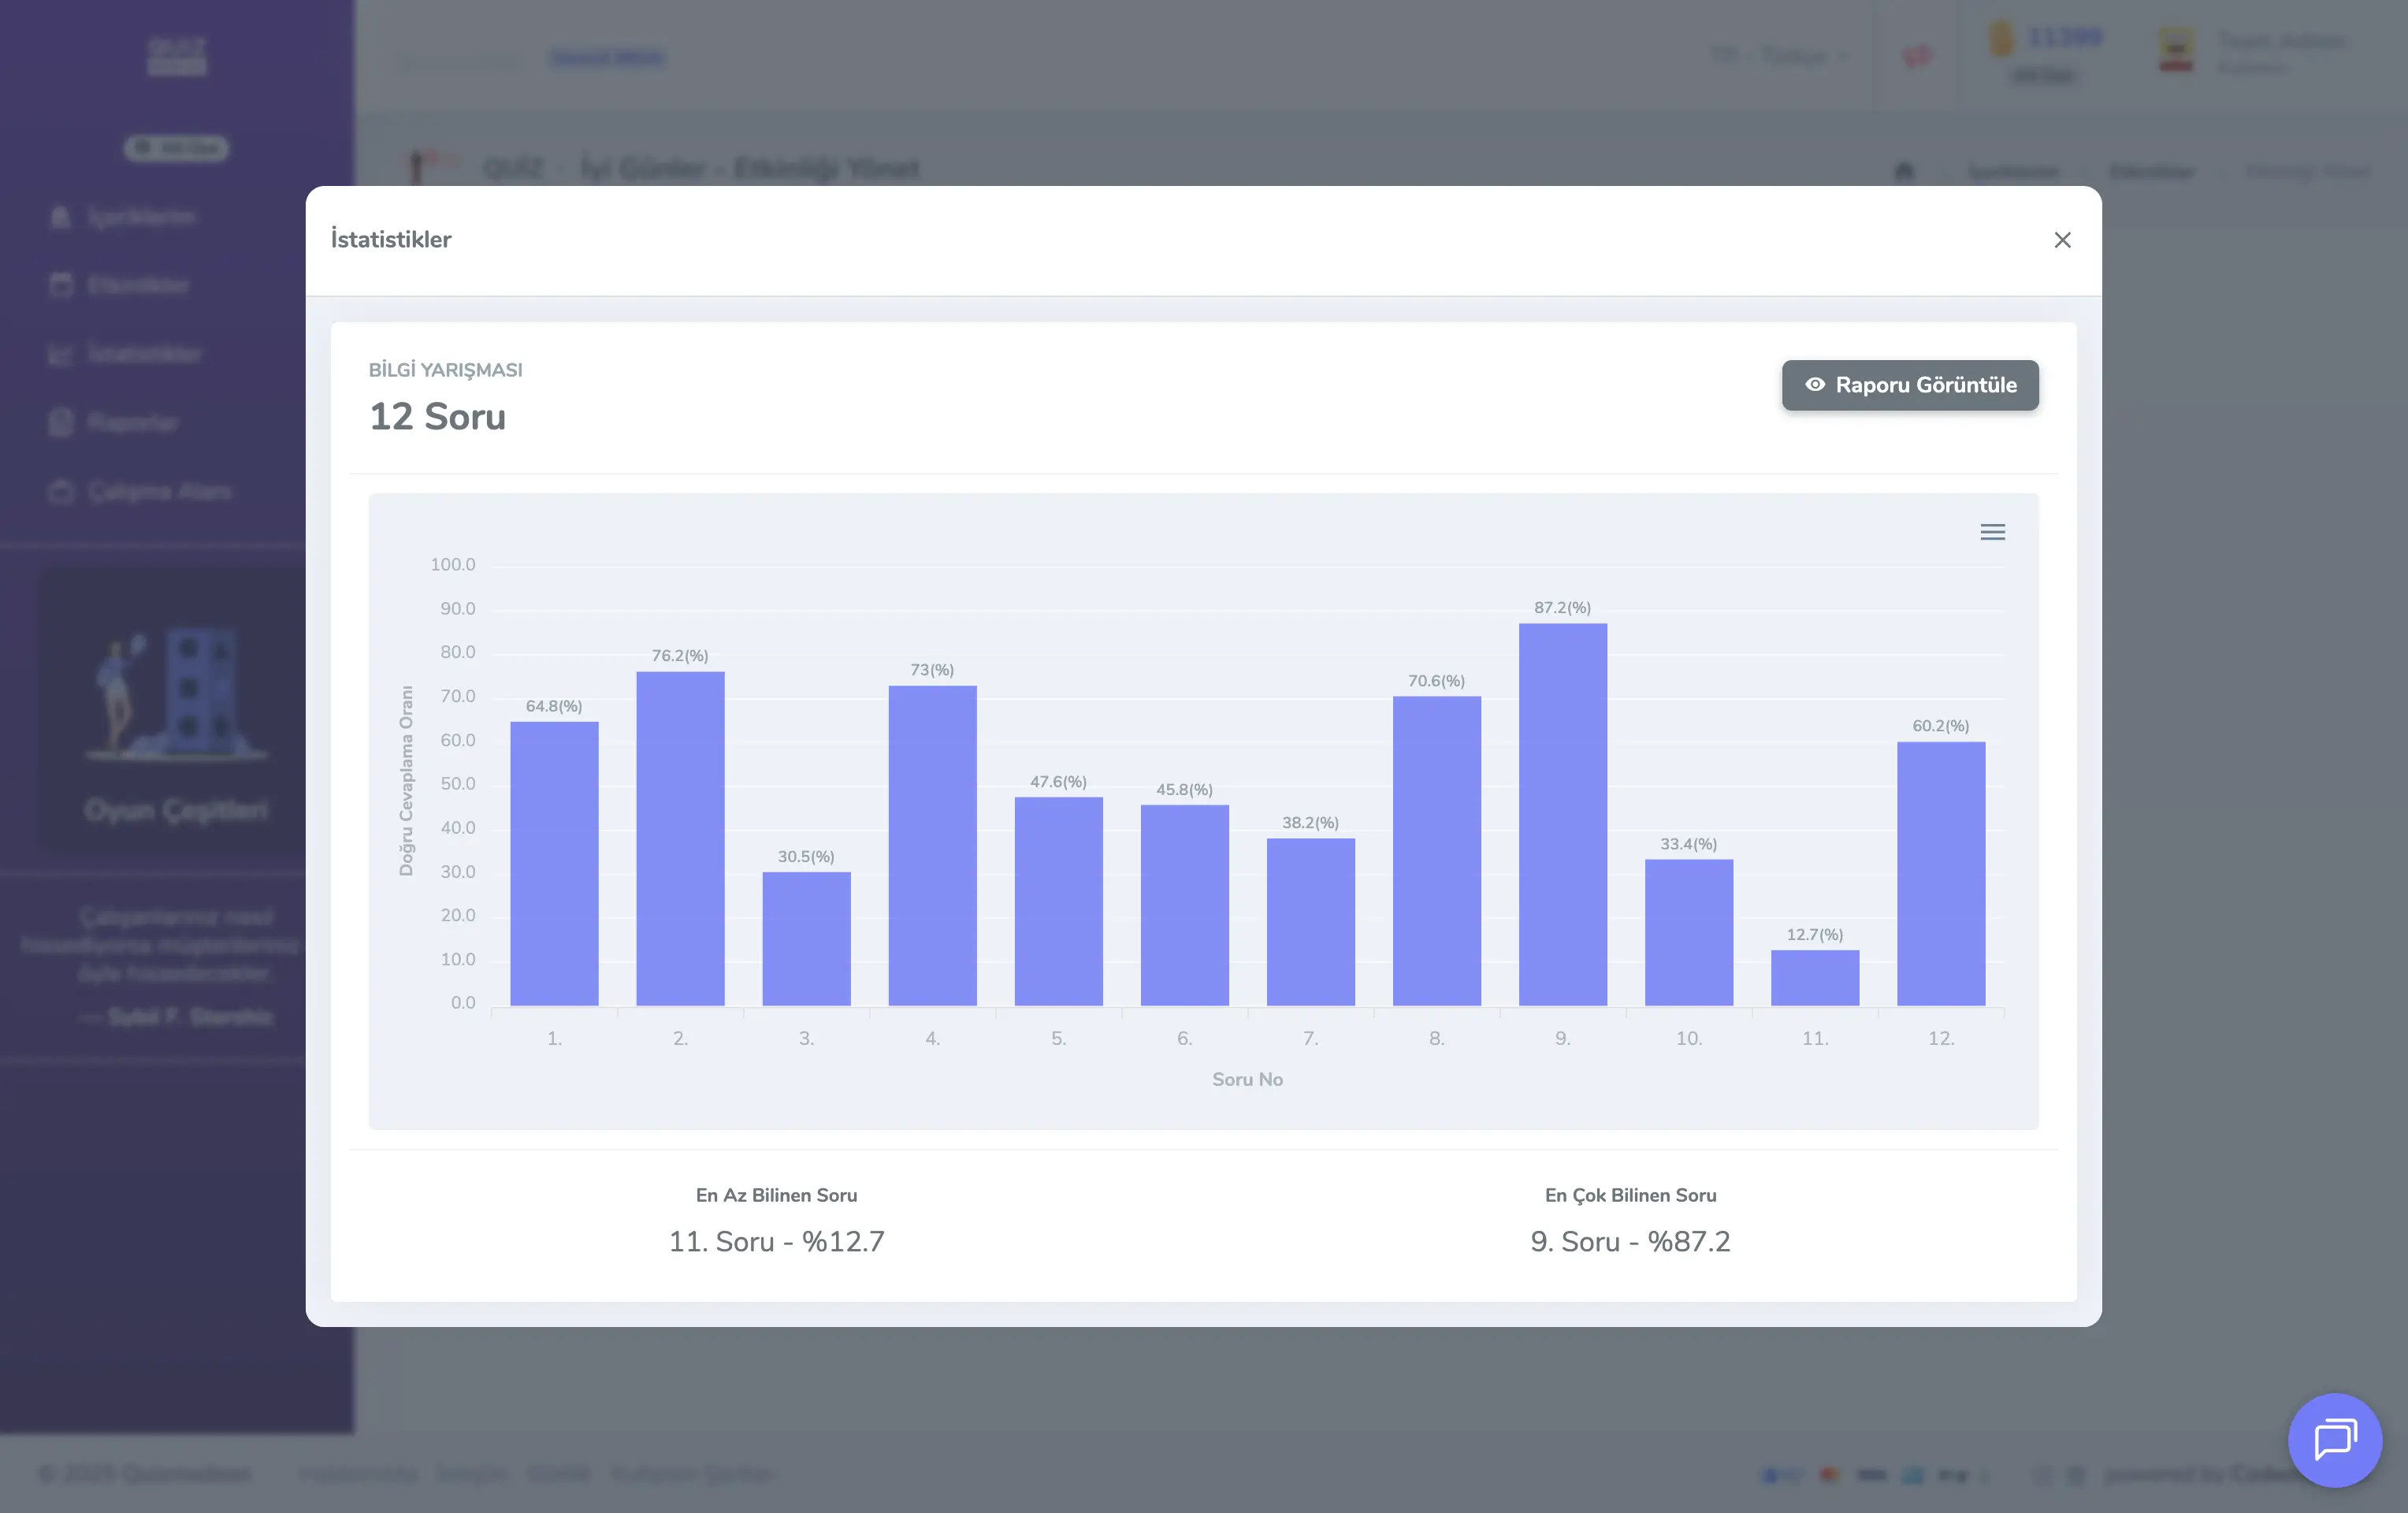
admin member - events - event management - reports - charts
Event Participants: If you want a quick look at the people who joined the event, you can reach the full list from All Participants under the Participants button.
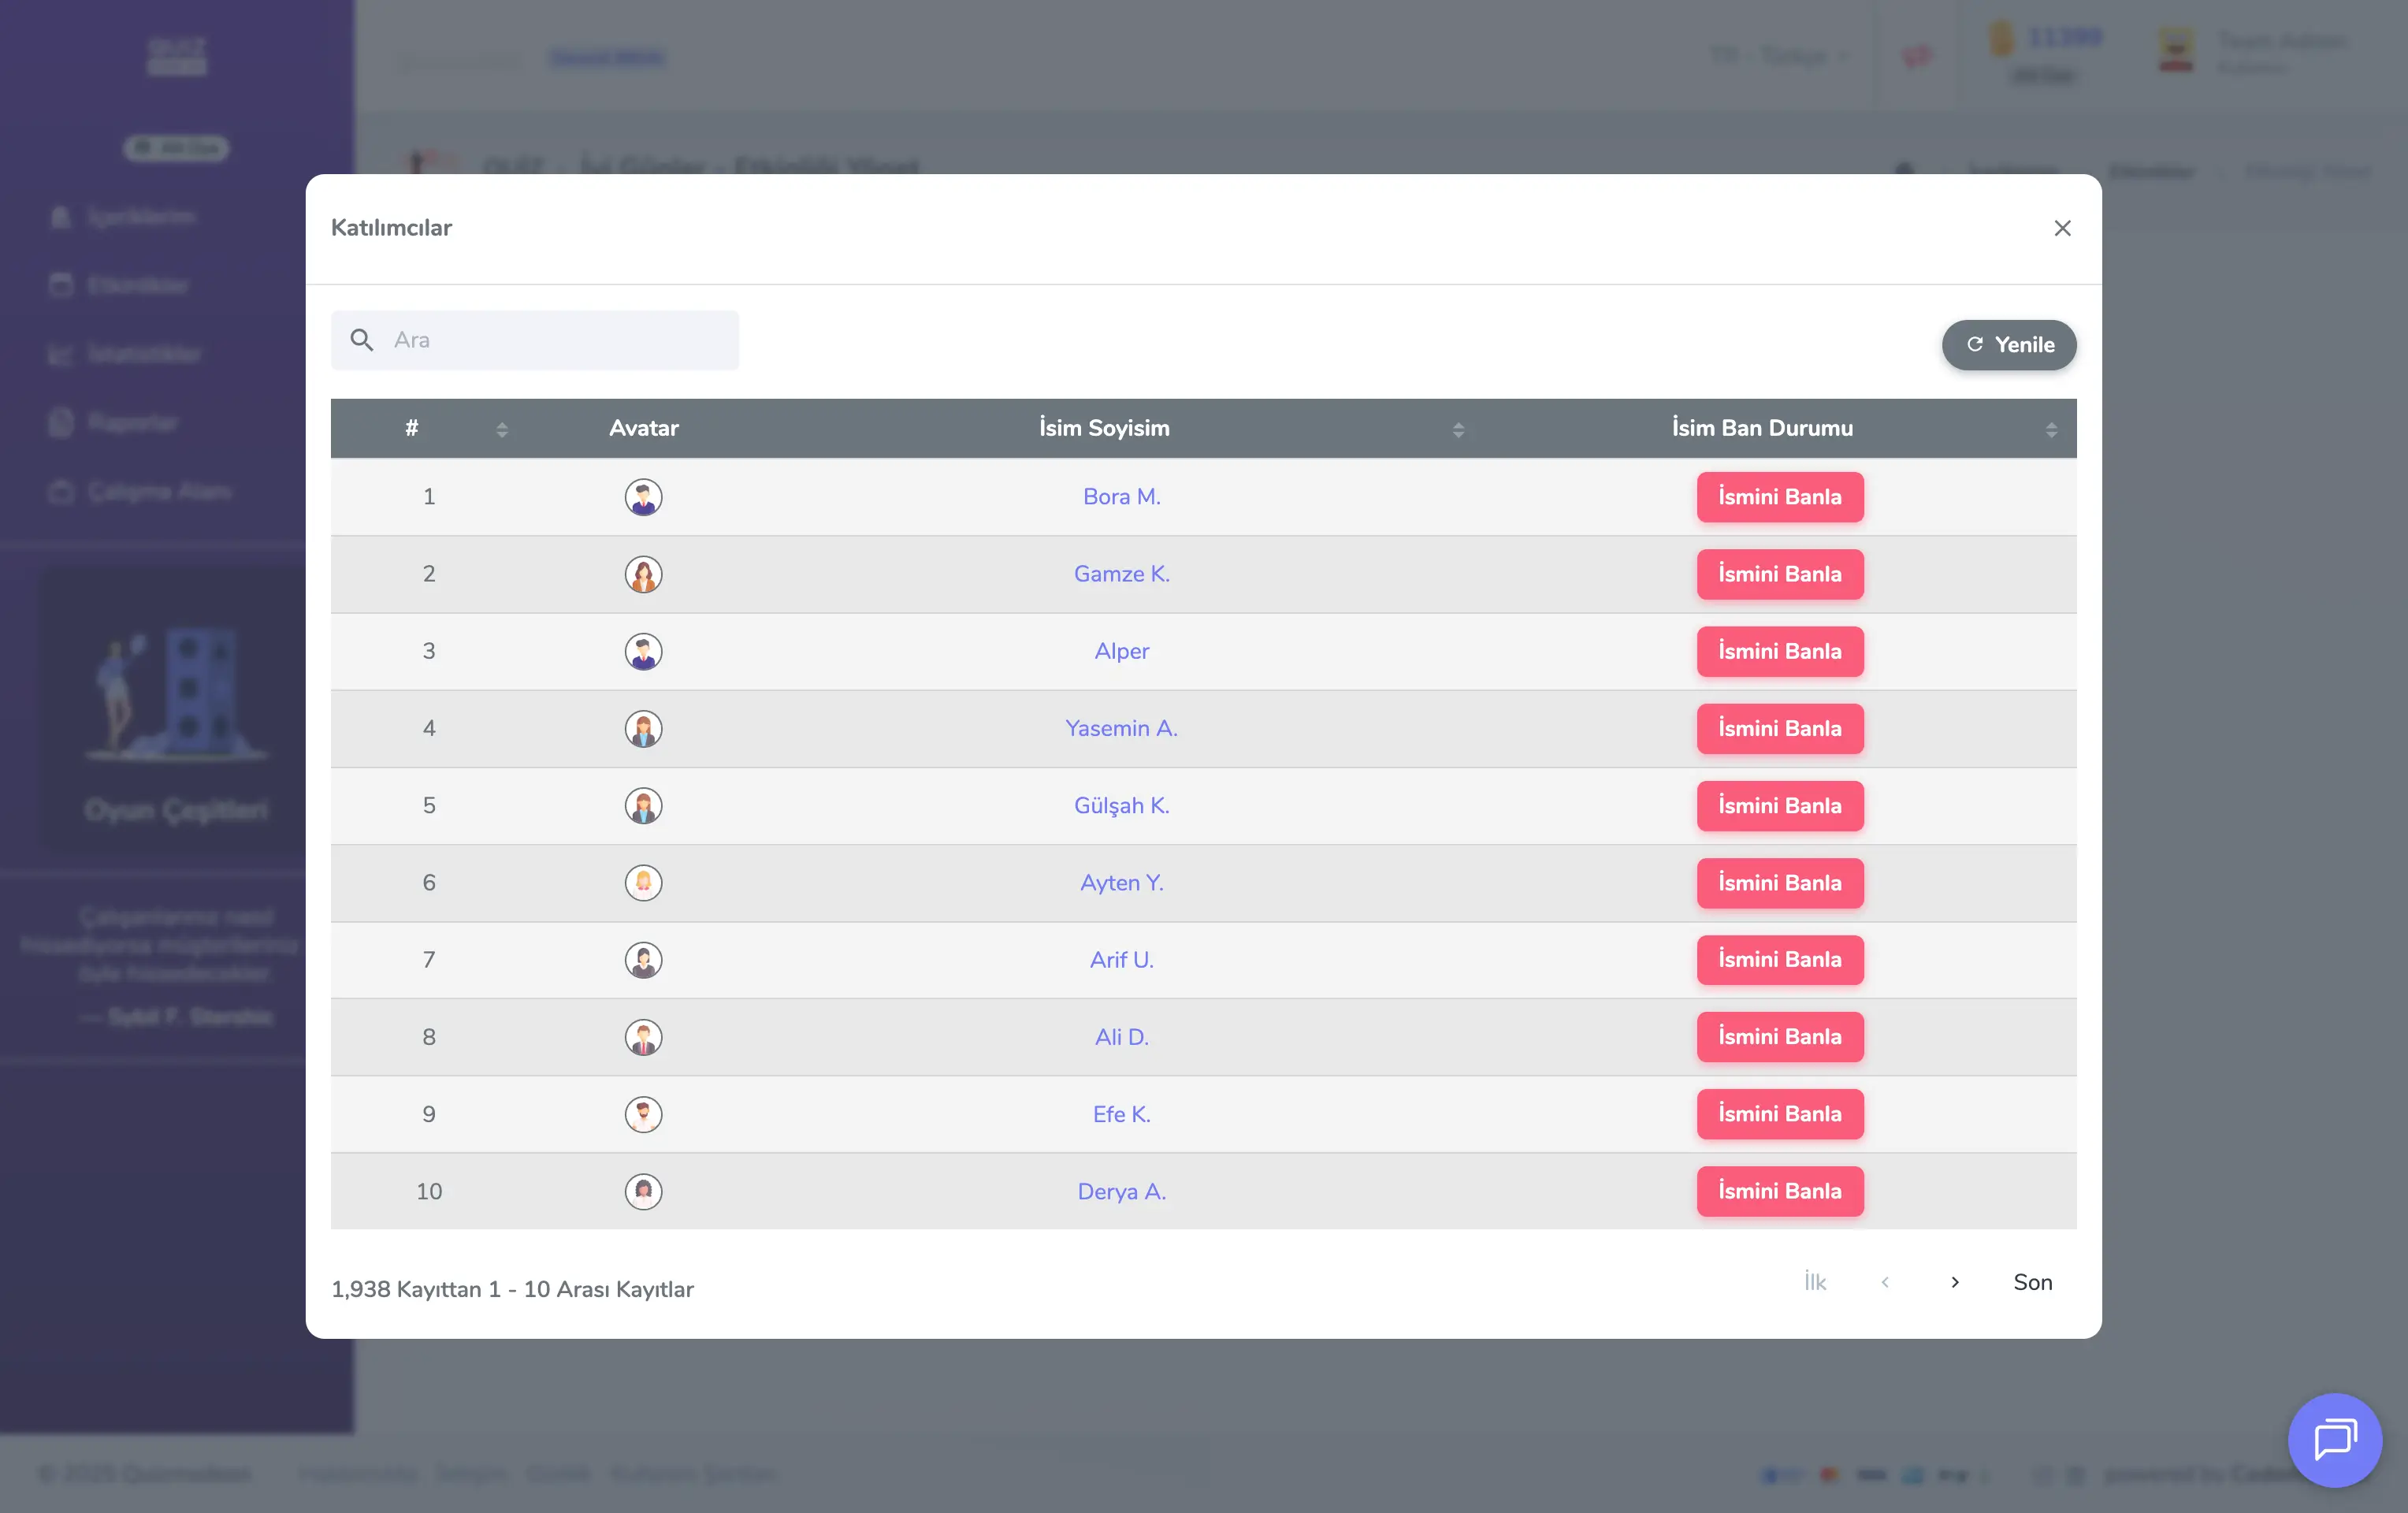
admin member - events - event management - participant list and management
Note: If, during the event, there is a participant whose name you find inappropriate, click the Ban Name button to change that name to Participant #0.
High-Scoring Participants: If you want to look at the scores of the people who joined the event, you can reach the full list from High Scores under the Participants button.
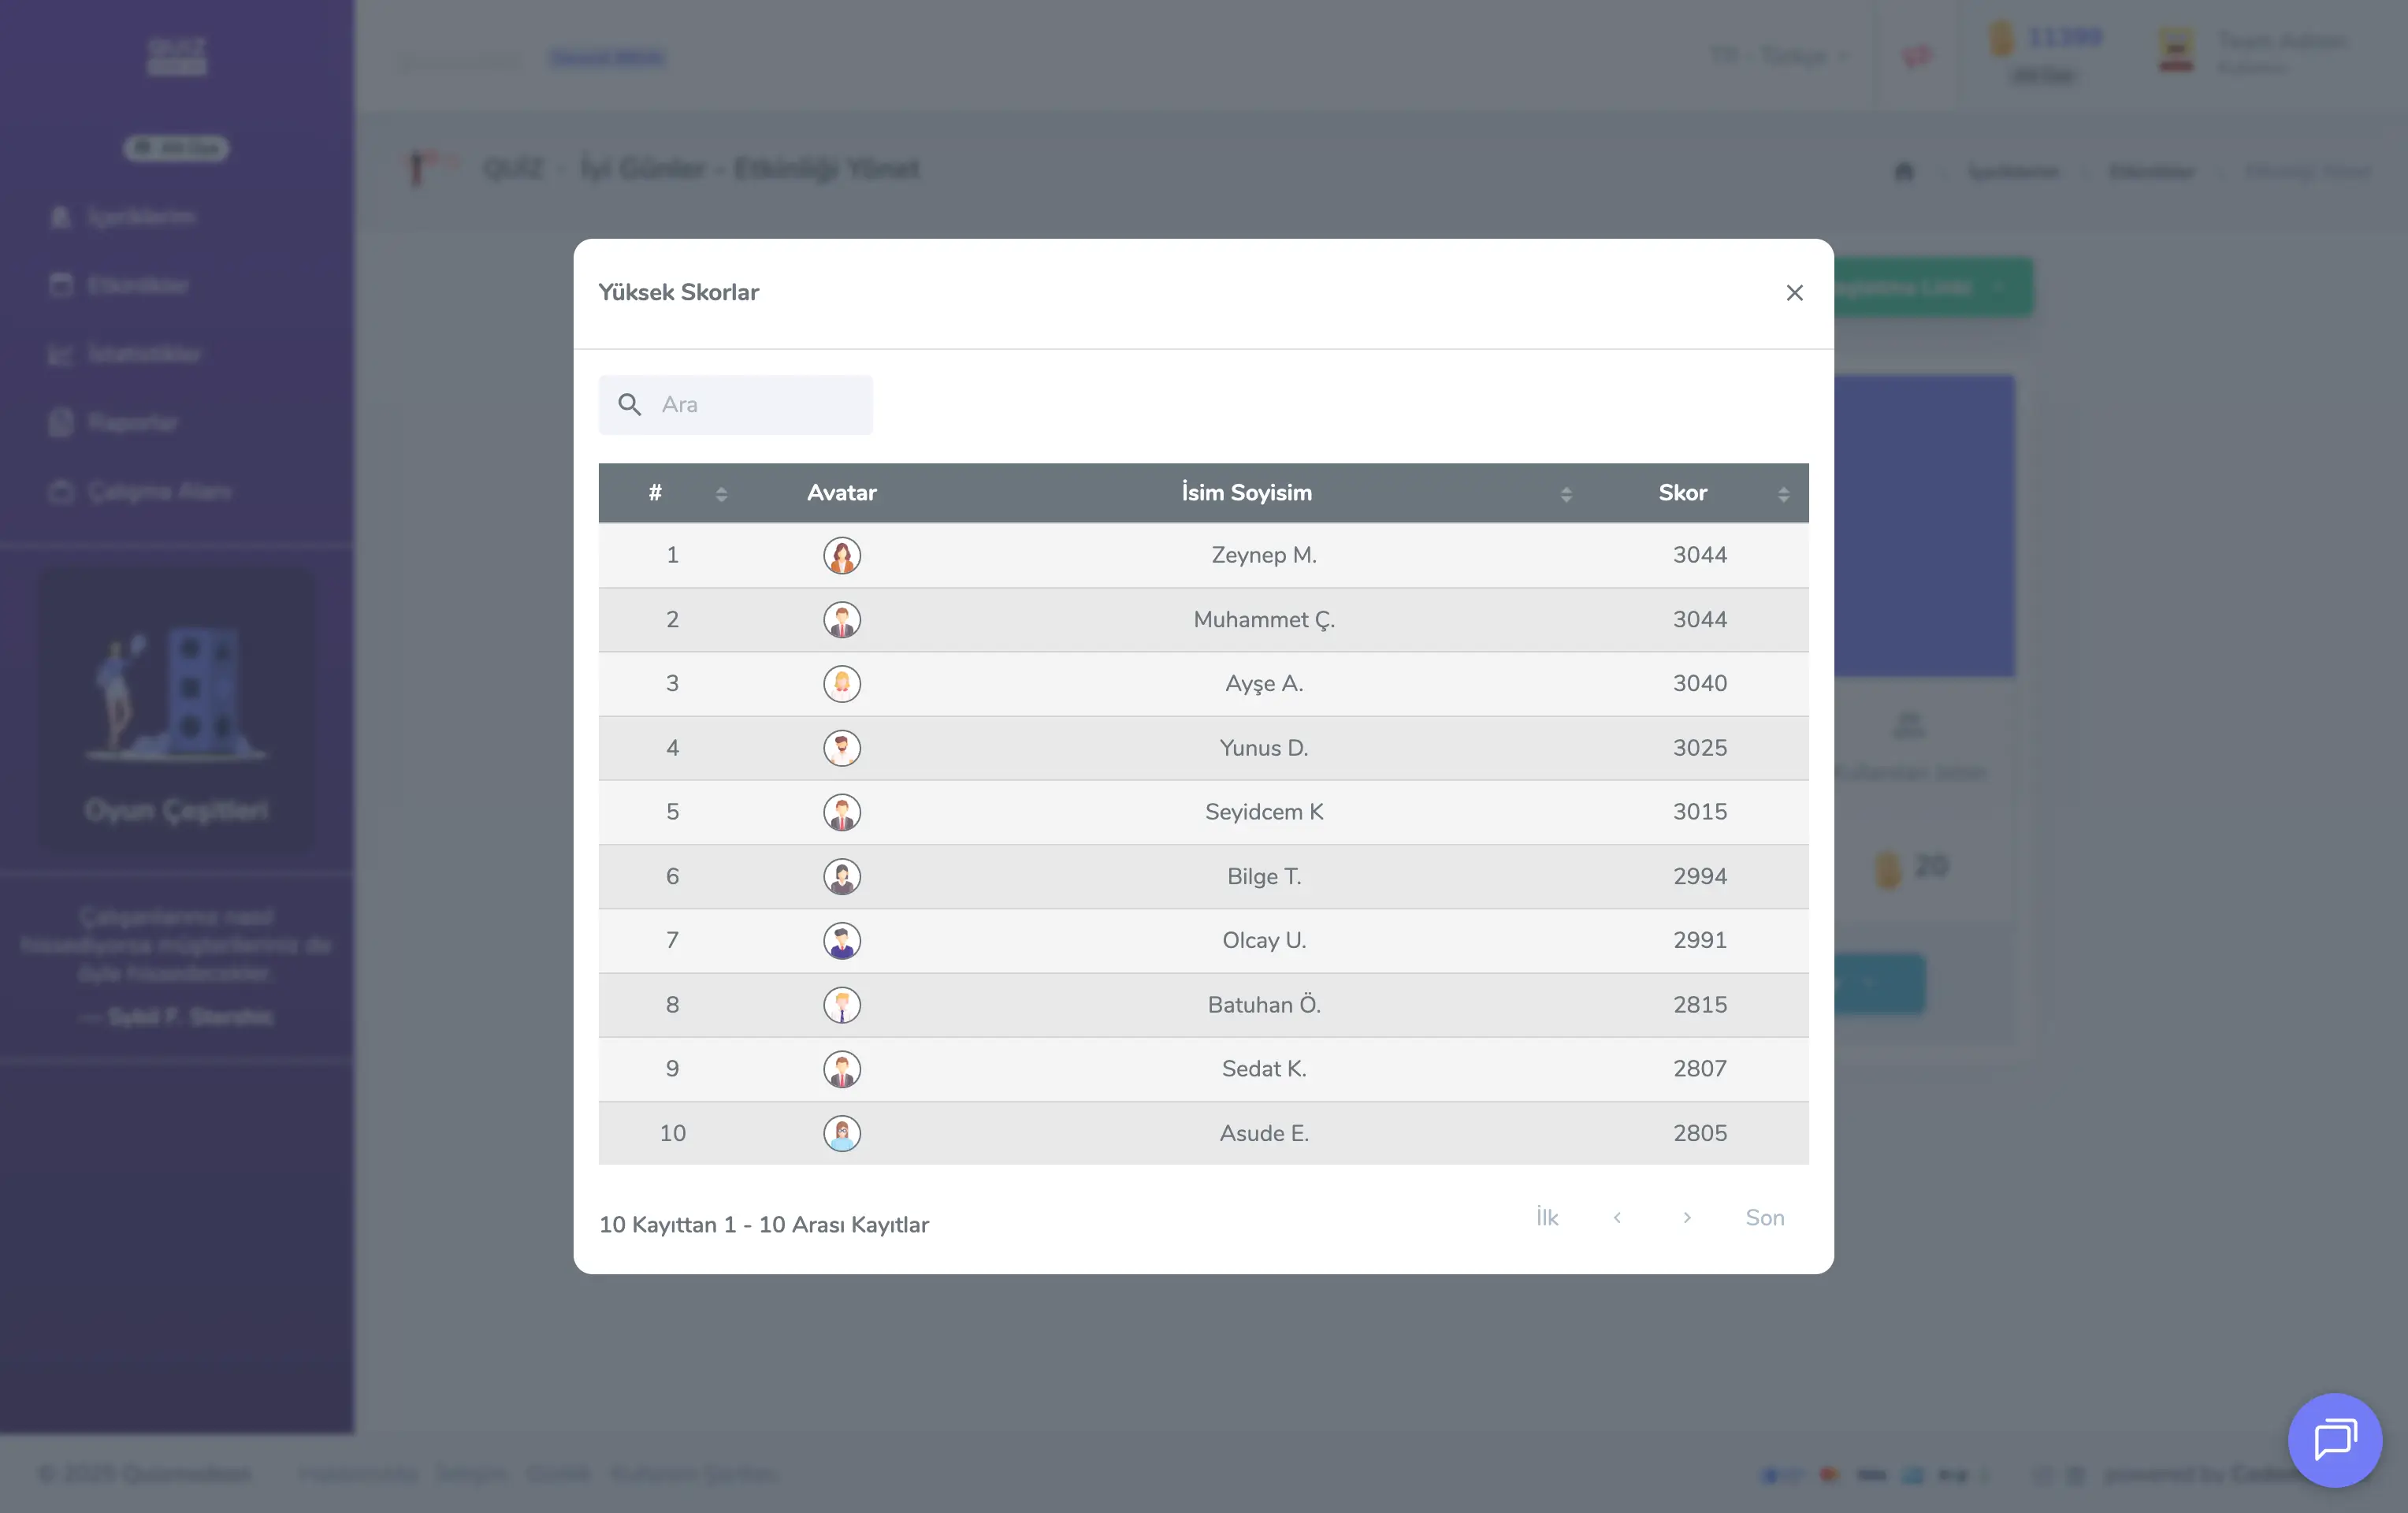
admin member - events - event management - high scores
Event Details: To see the defined event settings and other details, you can reach various information (PIN, flow type, answering time, number of jokers, selected event modes, defined registration fields and rules, etc.) from View Event Details under the Details button.
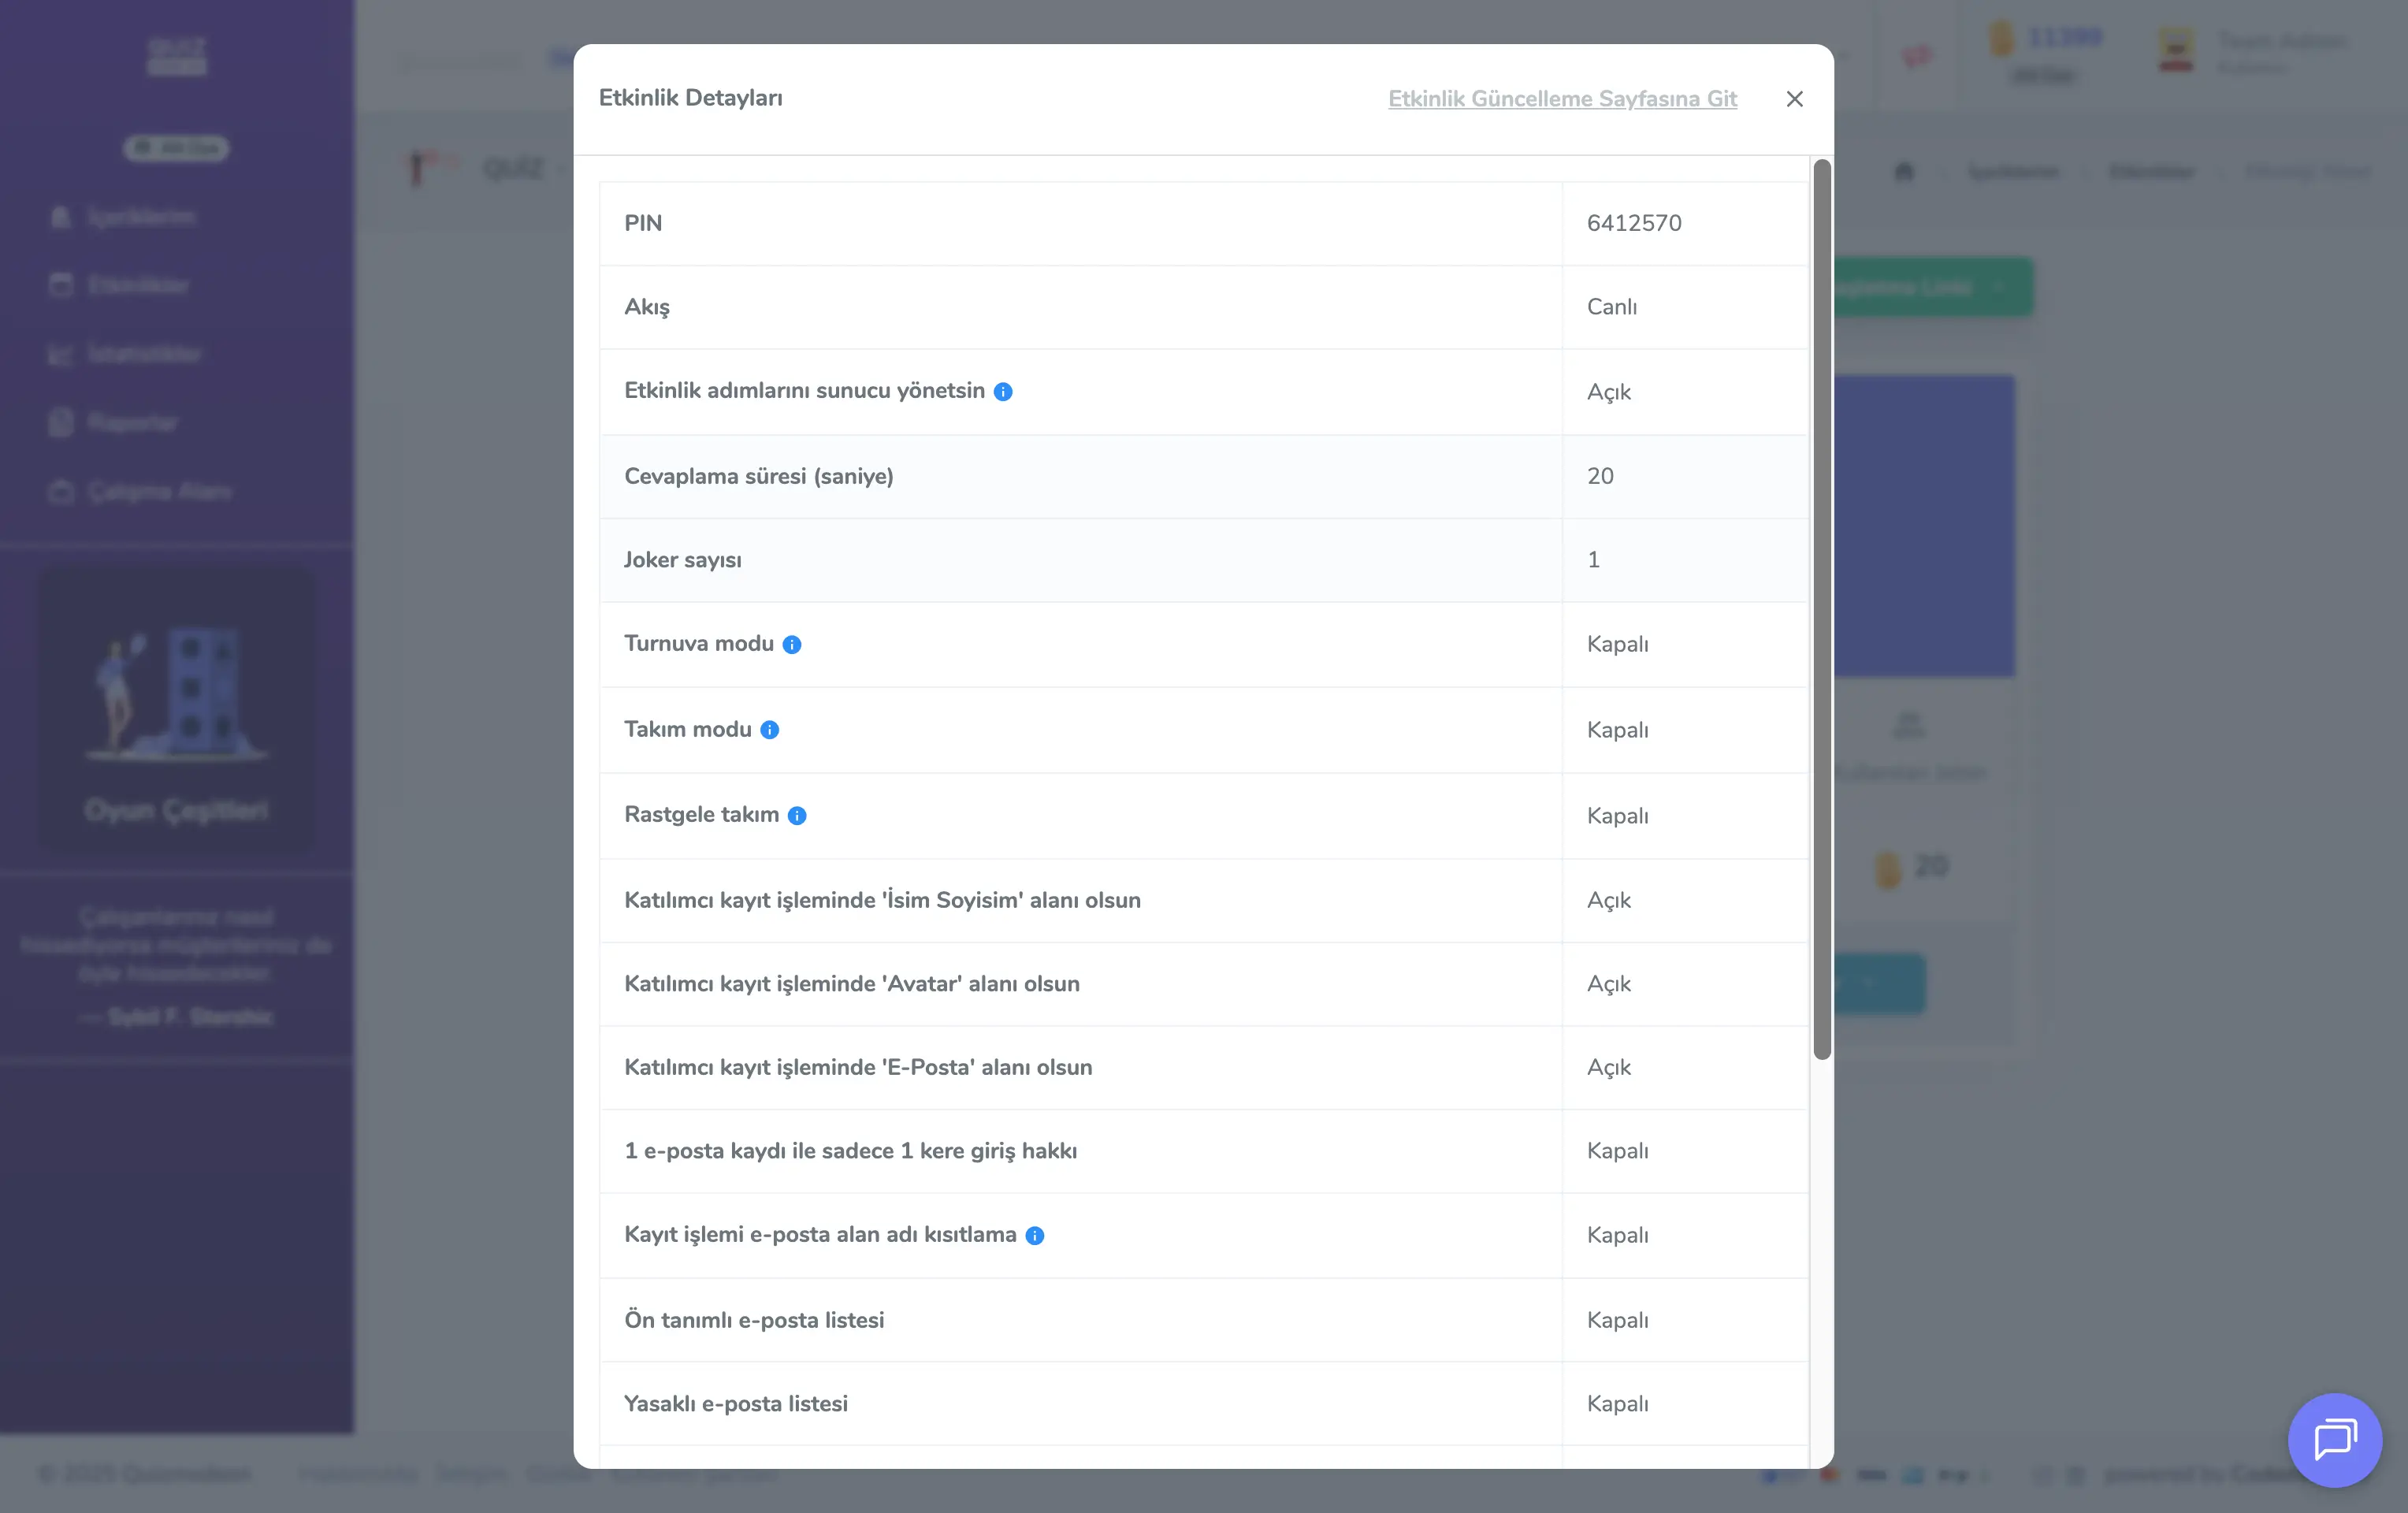
admin member - events - event management - event details
What are event operations?
Click the Event Operations button at the top left of the event management page to update or reset your event.
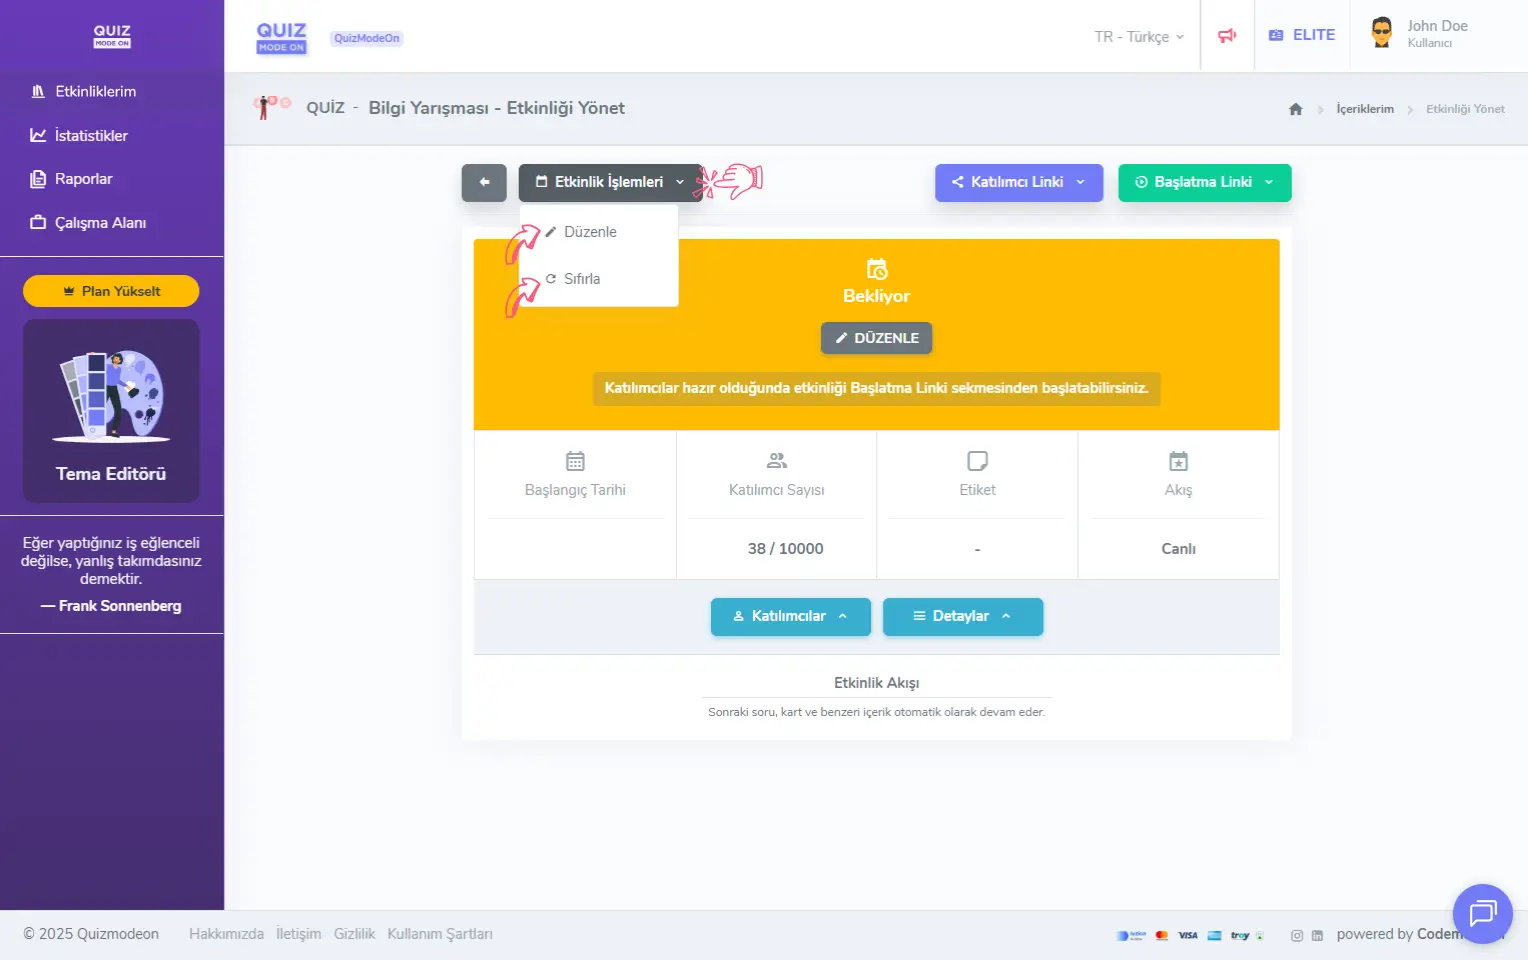
admin member - events - event management - event operations - editing and resetting
Updating the event
Click Edit under the Event Operations button to update the event content, the event settings and the event theme.
Note #1: The Edit option is available only for Waiting Events.
Note #2: Started Events and Finished Events cannot be updated. The Edit option becomes active only after the event is reset.
Resetting the event
Click Reset under the Event Operations button to return the event to its initial state. When an event is reset, all users who had logged in earlier are also removed from the event.
Note: The Reset option is available in every event status. If you want to take a quick look at the flow or run a test before the event, such as a rehearsal, you can use Reset to return the event to the beginning, to the waiting status.